Taking apart some Food Myths

Recently the New York Times published an article by the wise and esteemed health, nutrition and science writer Jane Brody.  What You Think You Know but Don’t About Wise Eating

I’ve been reading her by lines for decades.  Even had a copy of her Jane Brody’s Nutrition Book back when I first began running seriously.  In my estimation she has always presented a well-modulated voice when it comes to feeding the human body.

Over the course of the last week Ms. Brody has been taken to task in the sustainable food press and blogs for glossing over and side stepping some of the glaring inconsistencies in her article.  While the core of the article is well intended I’d like to offer a bit of guidance on its intent.   Let’s take a look at these one by one.
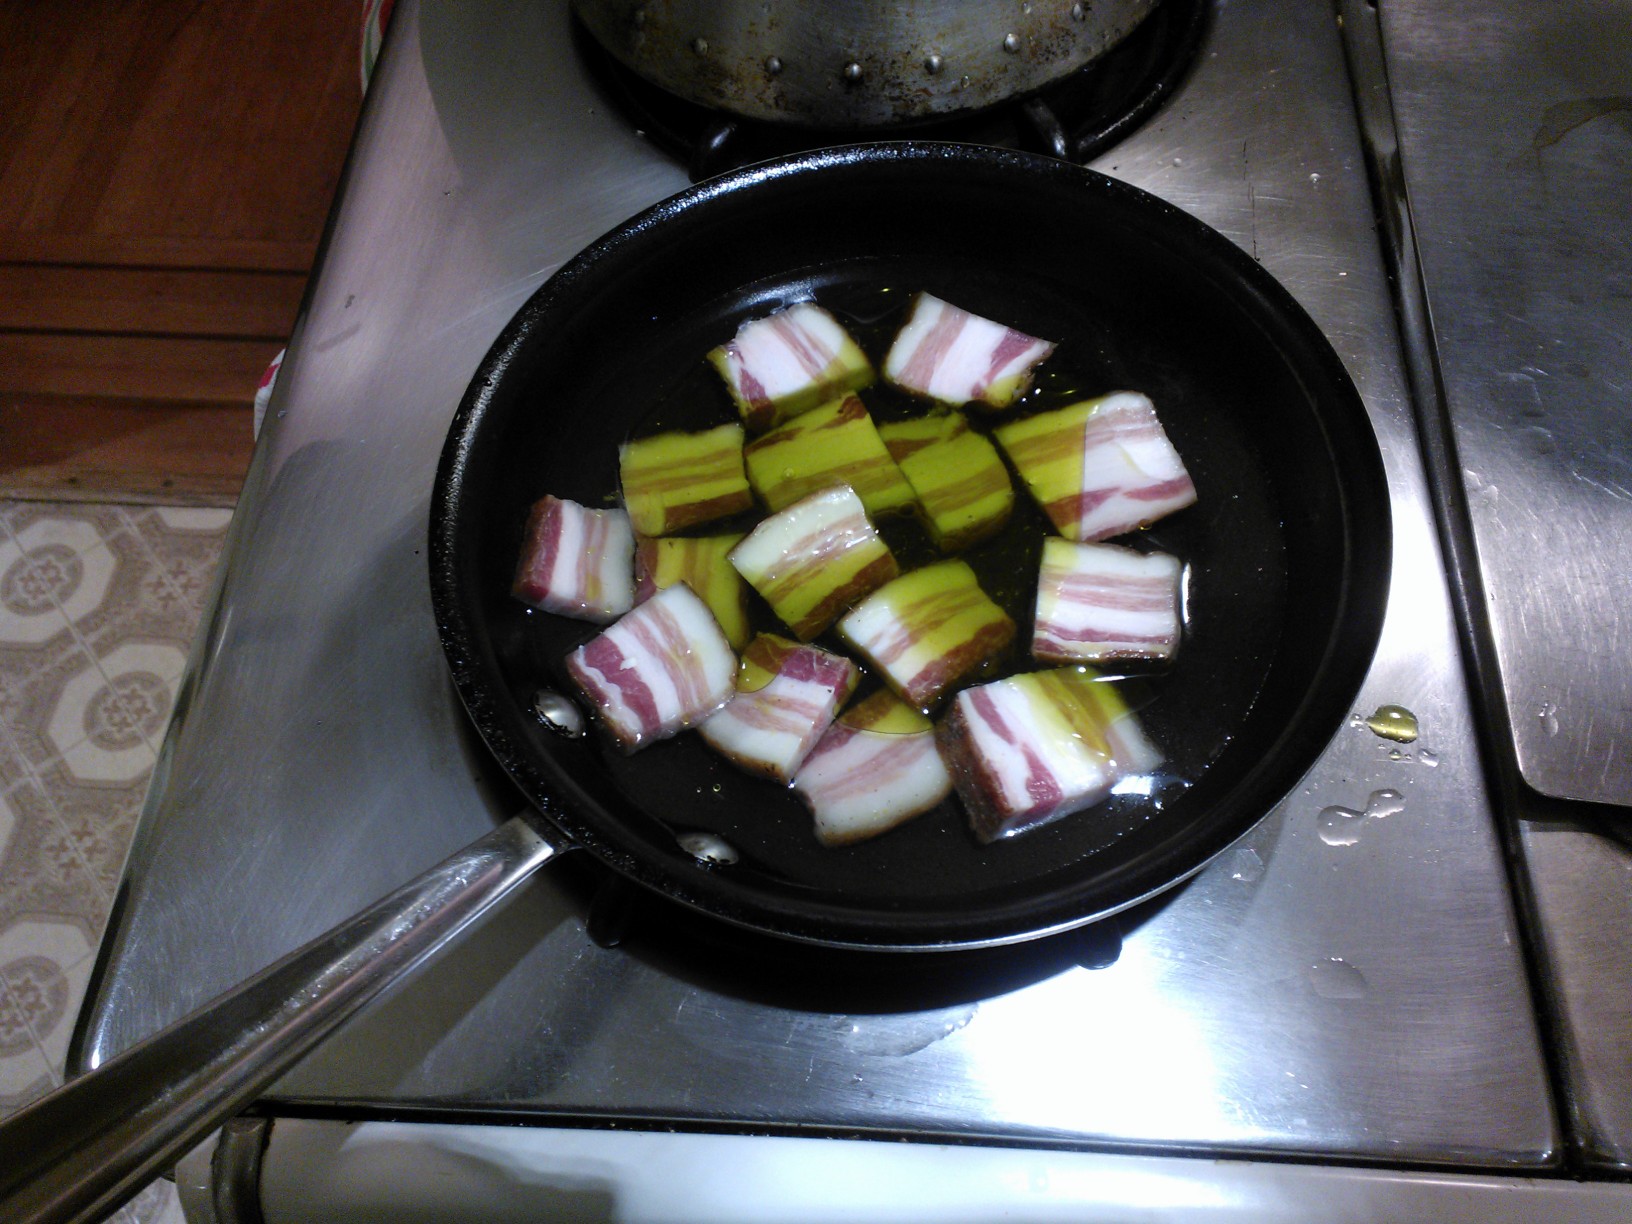
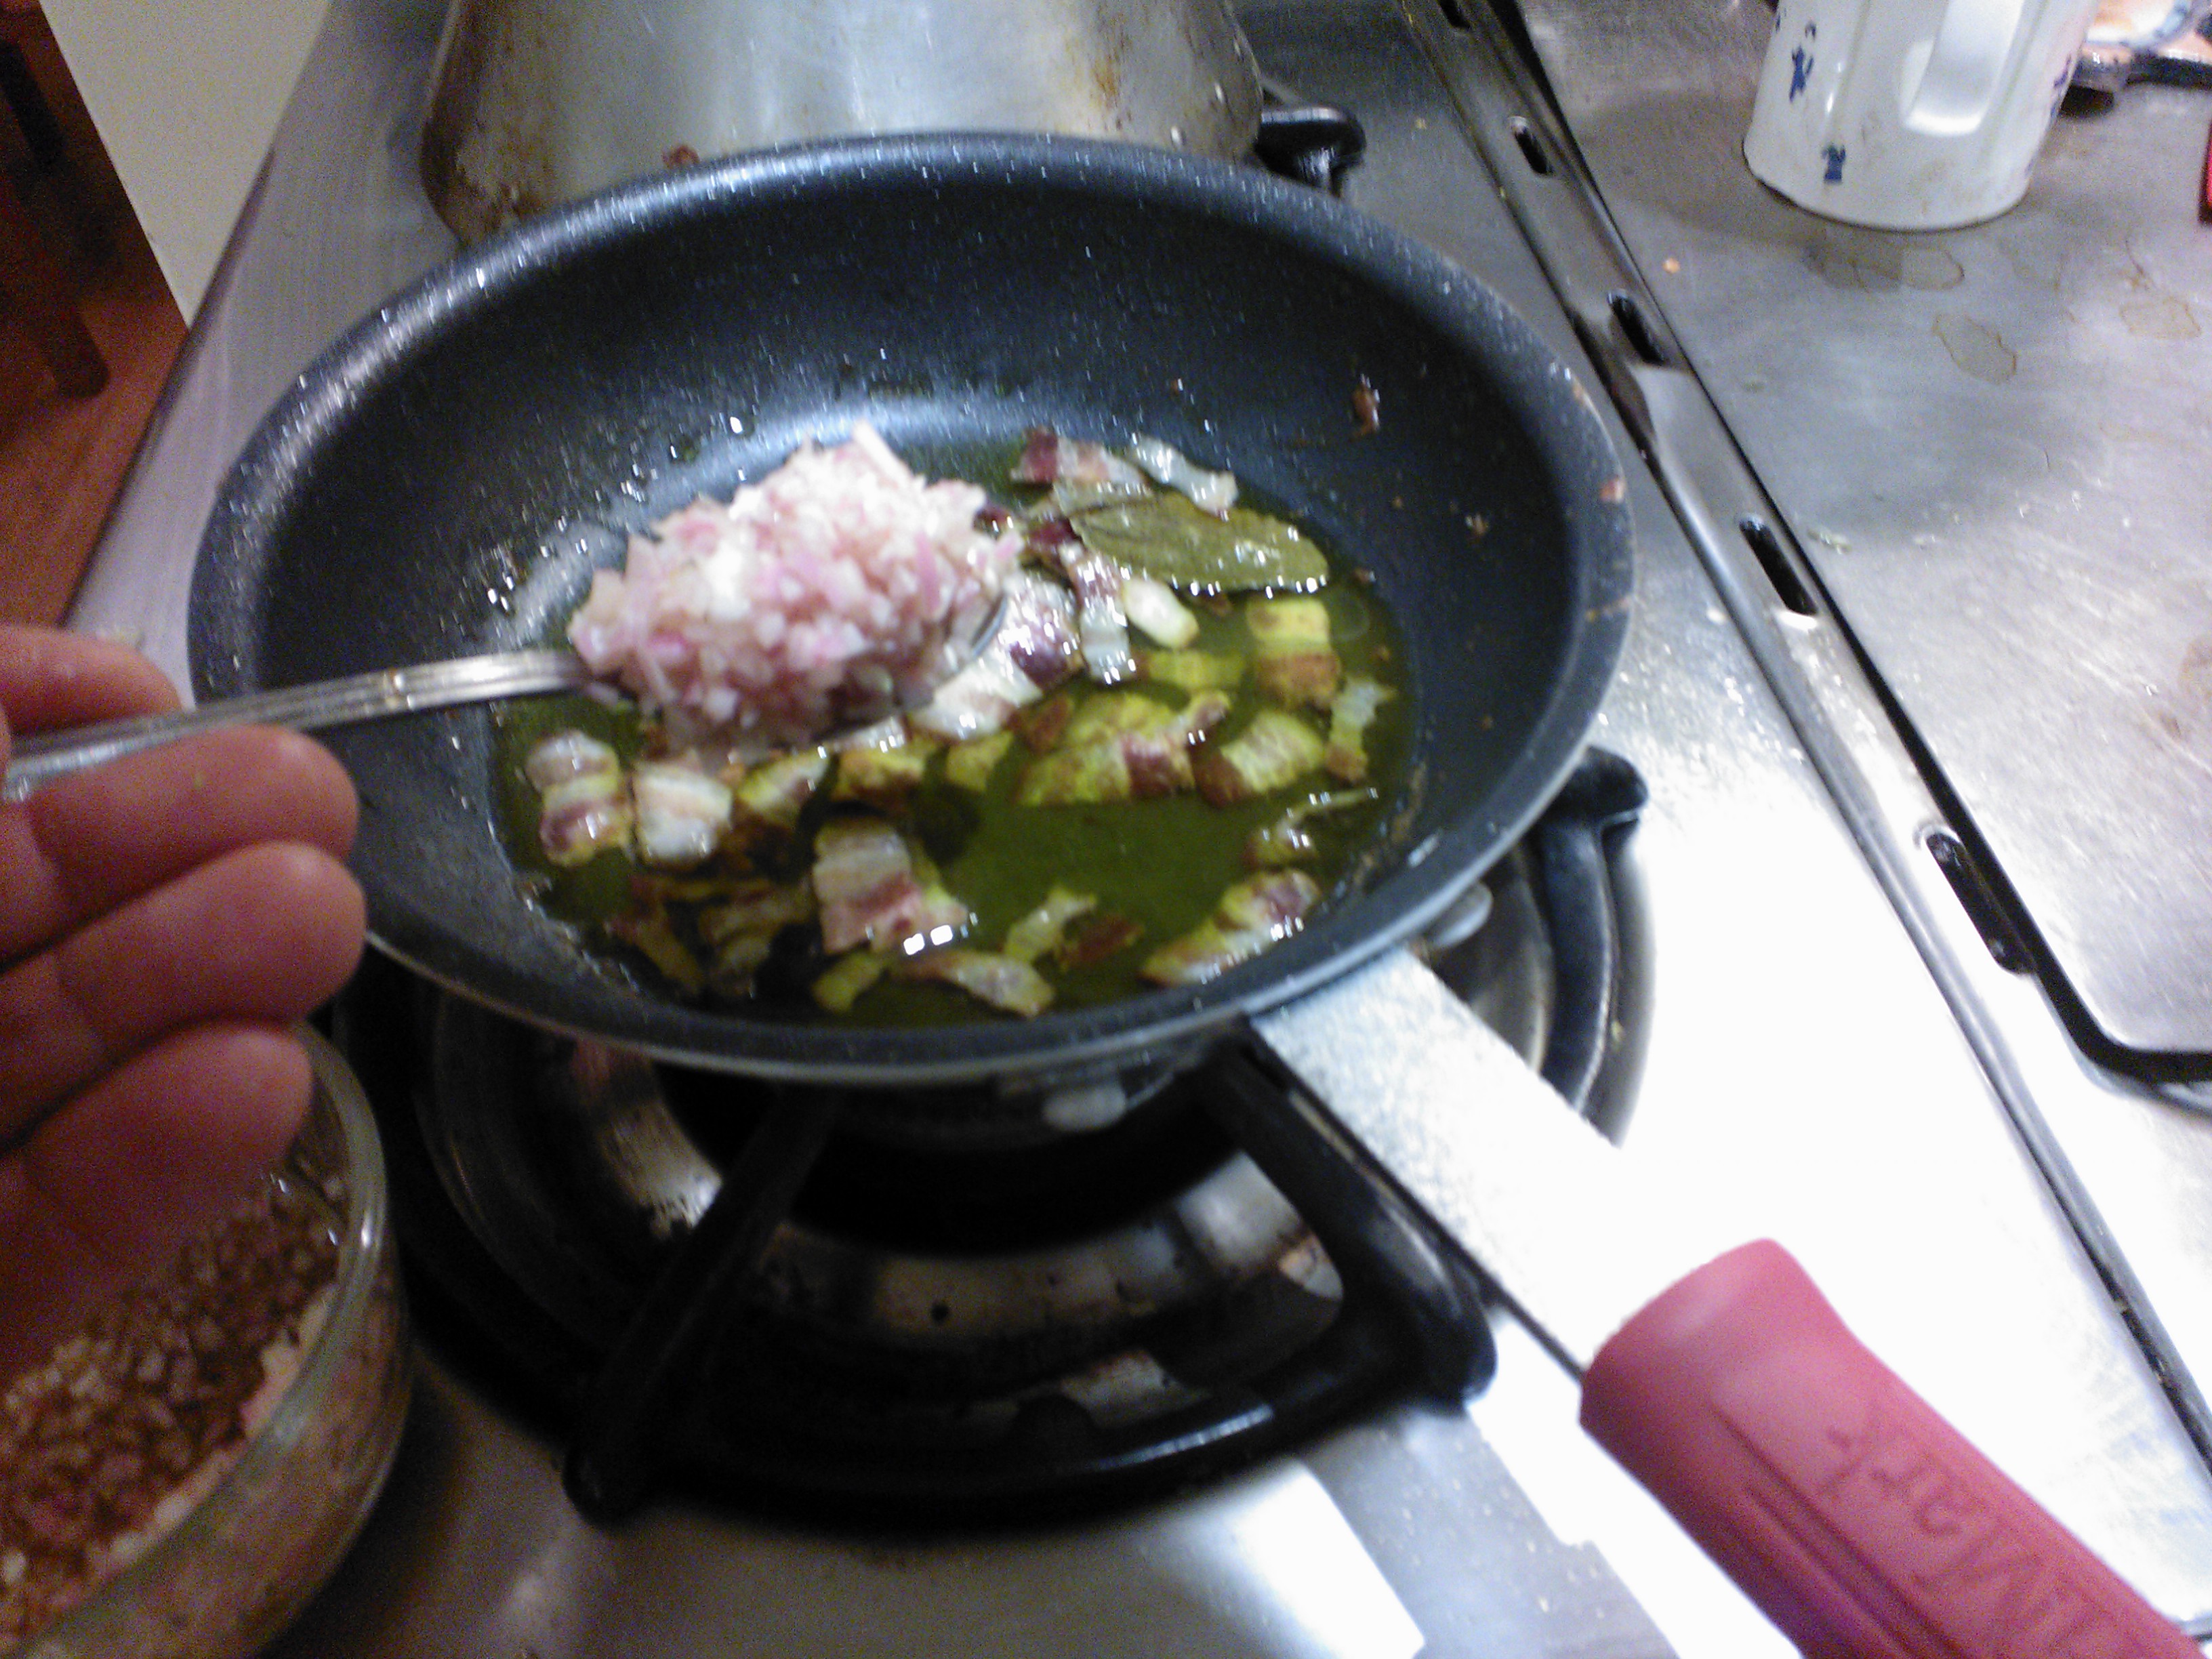
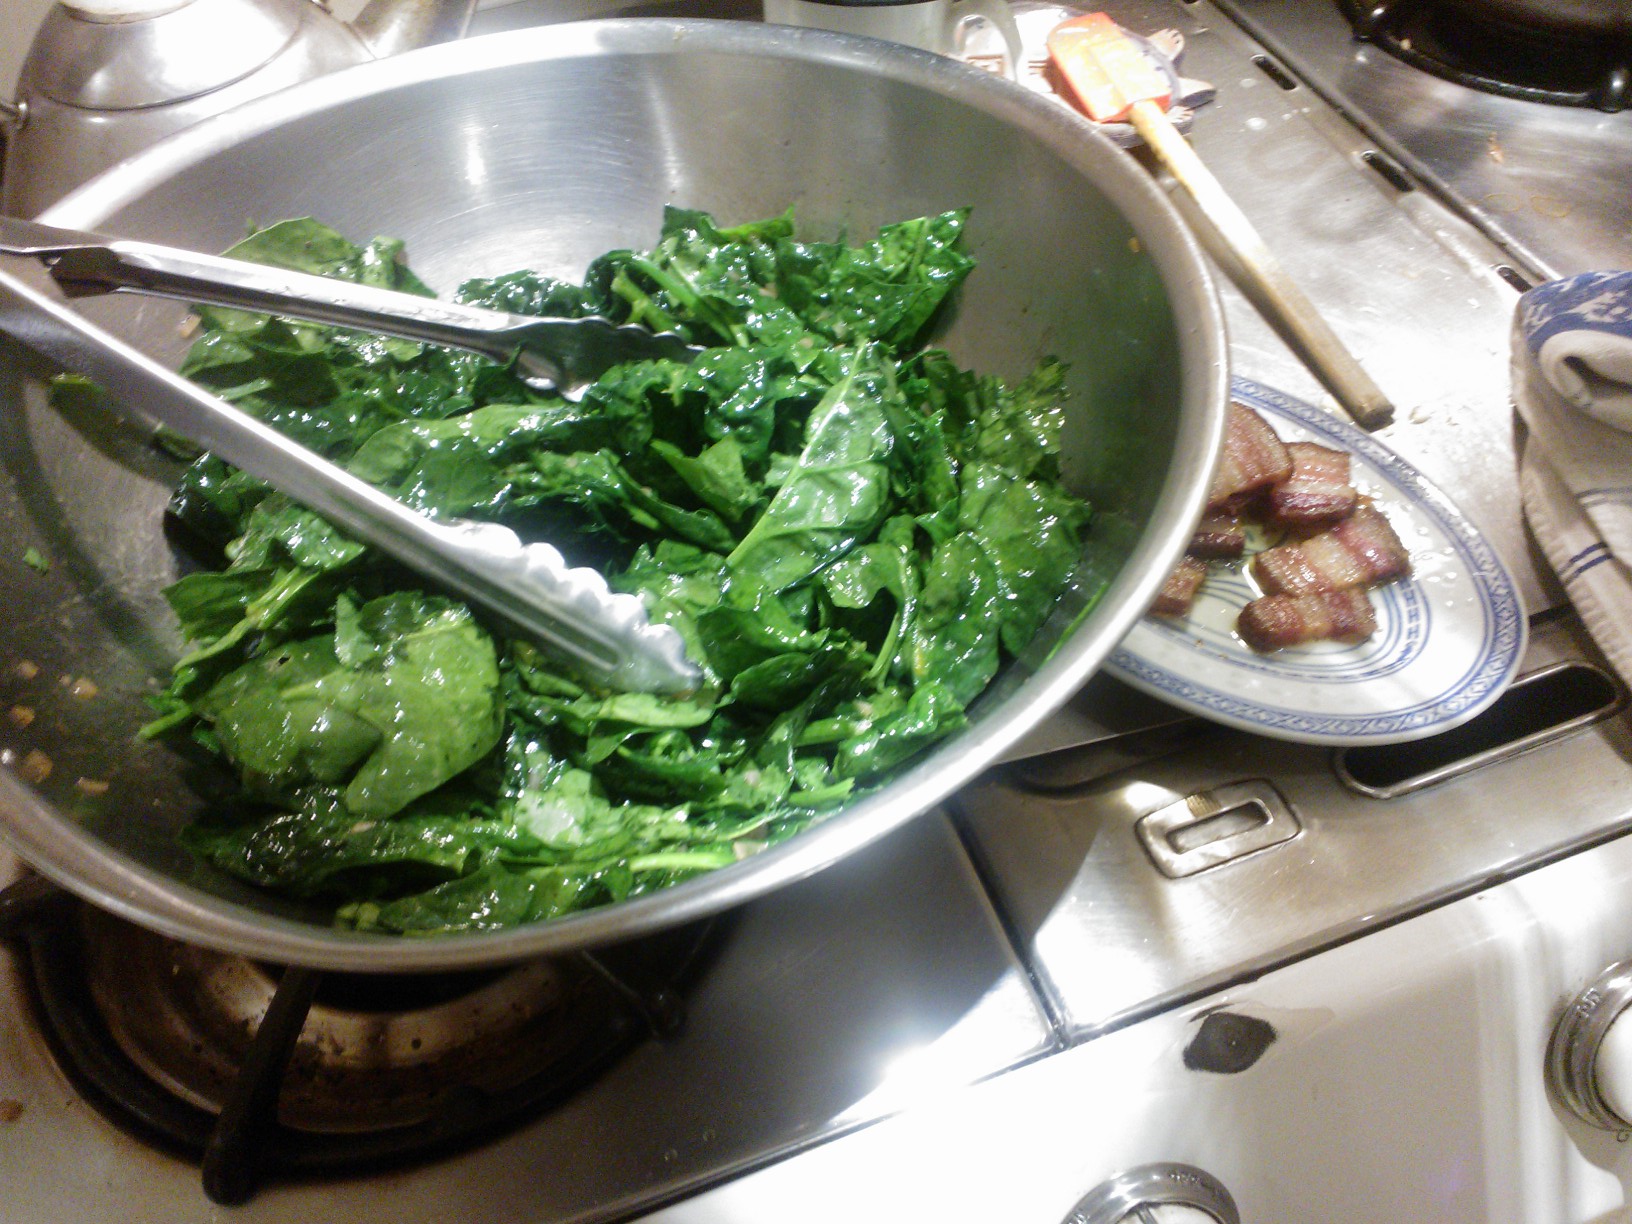
Cured Meats  Here Ms. Brody suggests that steering clear of any cured meat.  It seems like a good idea.  I’m going to disagree for two reasons.  First off I’ll apply the “all things in moderation clause”.  True that cured meats like bacon (a perennial favorite of many), prosciutto, coppa, salume of all kinds carry a load of sodium and fat.  My suggestion is to use these item as a flavor highlighter.  Small amounts in salads, sandwiches, a pasta or risotto for instance can really bump up the flavor.  Remember that it may take only an ounce or less of any of these to give some big flavors on the palate.  When you start to dump the stuff in without thinking its over kill.  Its dumb and a waste of good food.

Her concern about cured meats that use the concentrated celery juice as a replacement for nitrites is a bit unfounded.  The powdered celery and celery juice contain high amounts of nitrites which along with salt, sugar and time are the foundations for good effective curing.

Michael Ruhlman in his blog sums it up pretty well on this one.  http://ruhlman.com/2011/05/the-no-nitrites-added-hoax/

“Please, if someone can tell me what is wrong with nitrites (in green vegetables) and nitrites (in curing salts and in our bodies, a powerful antimicrobial agent in our saliva, for instance), I invite them to do so here.  In the 70’s there were studies finding that at high temps, they could form nitrosamines, cancer causing compounds.  I don’t disagree, but burnt things containing nitrite are bitter and unpleasant so we’re not likely to crave them in harmful qualities.”

Meat Glue  Whoa, betcha haven’t been running into this one on your shopping trips recently.  On this one I don’t have a any disagreements.  Some restaurants might be using it.  Most often this is going to be in spendy, trendy food joints.  Think molecular gastronomy.

Trans Fats-  They’ve been taken out of nearly all foods.  By Law.  They were never any good to begin with.  Just a cheap way to make cheap food cheap.  Her statements about “naturally occurring” trans fats is accurate.  The point about conjugated linoleic acid should be well taken.  For instance one place you’ll find it is in grass pastured animal meats.

Organics As I’ve written previously in the the well seasoned athlete / the-sustainable-athlete its wiser for us to think local and seasonal first.  Organics are great but if you shop at Trader Joe’s for your organic red and yellow bell peppers, tomatoes or bags of greens look closely at the label to see where they were grown and harvested.  My research has that stuff coming from far, far away.  Her points on the health benefits of organic over conventional are ok.  As far as genetically modified foods the most important thing is labeling.   They must be labeled.  Vote for it next time.

Farmed Salmon- Sadly,  Ms. Jane Brody should be pilloried for her comments on this.  I’ll be up front and say that aqua cultured fish is the future of fish.  Tilapia, Catfish, Striped Bass, Sturgeons, Steelhead, Char, Trout and some shrimp are raised, successfully on either an all vegetarian diet or a primarily vegetarian diet.

Salmon however is not the future of fish.  Her logic that there is simply not enough of it to justify farming it so we can continue to eat it is just absurd.  The bio mass loss is still too steep, roughly 4 lbs. of fish to create one pound of farmed salmon.  (see End of the Line  and  Four Fish  )  Couple this with the environmental impact of salmon farming and it’s a non-starter.  Sea lice infestations spill over into wild fish populations.  Heavy use of antibiotics are necessary to keep the salmon healthy.  The chemical Malachite_green is used to treat the netting so the abrasions incurred by the densely packed in salmon don’t become infected.  Best to just say no to farmed salmon.  There are other, much better, alternatives out there.  And if you happen to live near a market that sells the real live wild version, buy it when you can.  You’ll be helping out a salmon fisher somewhere.

Nuts-  Again Ms. Brody is right and on the money.  Nuts and nut butters are tremendous sources of protein, antioxidants, vitamins, minerals and fiber.  Also, they taste good and can be used in a variety of forms. (whole, chopped, sliced, ground into meal, ground even finer into flour).  They shouldn’t be saved for the occasional small bit on a salad. Think almond flour (or other nut meals) as a substitute for some of the flour in waffle or pancake batters, cookies and the like.  You can make your own nut butters which can be a very tasty way to pull together a hummus (think walnut butter and white bean hummus with ancho chile and lime).

So happy eating.  My hope is that you are following the well seasoned athlete.  If you’re shopping intelligently, cooking smart and eating well then you’re on the right track.

House Made Granola – Bulking Up

WP_000497Much of the information presented here at The well seasoned athlete focuses on basic cooking skills and technique.  This installment emphasises how to pull together a very simple recipe but fine tune it with a few steps that will get you a better, tastier product.

While I don’t usually eat a big breakfast each day there is one thing that is most commonly eaten in our household.  Home made granola.

The arc of my personal relationship with granola over the years has gone something like this:  started eating the stuff out of boxes (whoa! really sweet); then making my own (not as sweet but still too sweet and usually overcooked); to buying the bulk versions (and working through the myriad of flavored versions) and finally settling on making my own again.

Granola might be one of easiest things to put together.  It requires practically no special equipment or know how.  And with something like 4-6 ingredients that can be mixed together quickly homemade granola can be pulled together for around $2.40 a pound for the most basic of versions to $3.60 a pound for the more zoot recipe we’ll go through here.  That’s quite a bit of savings when you pay as much as $4.99 / lb for the Quaker Oats version while the bulk bins show prices from $5.29 to $3.85 per pound.  The bulk versions are still too sugary for my palate.  Add to this that the purist in me blanches at the thought of pumpkin pie spiced cranberry granola.  It just ain’t right.

Here is the recipe with a couple of tricks that will help you realize a wonderful version of your personalized granola.  Remember that you can customize the recipe in several ways by adding your favorite nut, nut combination, make it a bit sweeter if that is your liking or adding ingredients like flaxseed meal or dried fruit.  The two important tricks here are 1. warming the sweeteners and oil together, adding them to the granola mix, then baking; and 2. add the unsweetened, shredded coconut at the very end of the baking process. Also if you intend to add any dried fruit add it at the end same as the coconut.

Following these steps will make for a better, more evenly toasted granola.

WP_000484

  • 4 cup oats
  • 1 cup spelt flakes
  • ½ cup sunflower seeds
  • ½ cup sliced almonds
  • ½ cup unsweetened coconut
  • 2 Tablespoons brown sugar
  • ¼ cup maple sugar
  • ¼ cup honey
  • 2 Tablespoons olive oil
  • 1/8th teaspoon kosher salt

First mix together the oats, spelt, sunflower seeds, sliced almonds in a large bowl.  Add the salt.

WP_000485

Next in a sauce pan combine the olive oil, maple syrup, honey and brown sugar.    This step will allow you to combine the liquid ingredients together in a more uniform manner and mixing them into the oats/ nut mixture will be much, much easier.  Again it will yield a more uniform seasoning of the ingredients.

WP_000486-01

Warm this mixture over a low flame.  It’ll take about 3 minutes.  Stir a few times and don’t boil it.

WP_000488

Pour over the oats / nut mixture and mix together well.  Hint:  While you can do this with a spoon or spatula you will find it much easier to do with your hands.  If the maple syrup /honey mix is too warm mix at first with a spoon then switch to your hands.  You can also put on a pair of latex gloves if you want. Mix together until the ingredients are fully coated with the maple / honey mix.

Transfer the whole mix to a baking sheet(s).  Don’ pile it too high and don’t be afraid to divide it between several pans if need be.  It will toast up more evenly and quicker when done in thinner layers.

WP_000491

Bake in a pre-heated 350F oven.  Use a timer and set if for 10 minutes.  When the timer goes off stir the mixture around using a spatula.  Put back in the oven and bake for another 6 minutes then check again and stir from the sides inward.  You’ll see that the granola mix will show you it is toasting from the edges of the pan inward so you’ll want to bring that towards the middle of the pan and mix in well.  Repeat this step again.  Just make sure that it is not getting too dark, too quickly.  Each oven can be different and it’s not uncommon for the calibration to be a bit off.

WP_000492

Next for the last 5 minutes of the baking process you’ll add the unsweetened, shredded coconut (and/ or dried fruit if you want).  We add this at the end otherwise it will over cook during the first phase of baking.  Remember that many recipes will have mix everything together then just toss it in the oven.  Taking the time to separate out the process into several steps will give you a great tasting, more nutritious granola.

WP_000496

Nutrition Facts Serving Size  (85g)  (About 3/4 cup or 3 oz by weight)

Amount Per Serving Calories 360    Calories from Fat 110    % Daily Value Total Fat 12 g 18 %  Saturated Fat 1.5 g 8 %  Trans Fat 0 g    Cholesterol 0 mg 0 %  Sodium 135 mg 6 %  Total Carbohydrate 54 g 18 %  Dietary Fiber 7 g 28 %  Sugars 16 g    Protein 9 g

Vitamin A   0 %  Vitamin C   0 %  Calcium   6 %  Iron   15 %

The sustainable athlete

What is sustainability? What should the sustainable athlete look like?  Probably not very different from anyone else who tries to do the right thing by shopping and eating seasonally and locally.  When it comes to the food choices we make its a good idea to start with some basic ethics.  Over time you may find yourself modifying them as you become more confident in where to shop and what to buy.

First lets take a look at what the term sustainability means.  Here are a couple of decent definitions with which I have no problem. The first is from a seemingly unlikely source the EPA  (  http://www.epa.gov/sustainability/basicinfo.htm )  On their webpage they write. “Sustainability is based on a simple principle: Everything that we need for our survival and well-being depends, either directly or indirectly, on our natural environment. Sustainability creates and maintains the conditions under which humans and nature can exist in productive harmony, that permit fulfilling the social, economic and other requirements of present and future generations.  Sustainability is important to making sure that we have and will continue to have, the water, materials, and resources to protect human health and our environment.”

Not bad.  While our friends over at Wikipedia offer a lengthy dissertation on the subject, one section specific to food systems,  ( http://en.wikipedia.org/wiki/Sustainability  ). It’s worth a read.  Check it out.

Admittedly the label of sustainability may seem to be overused, abused and co-opted by more than one company or corporation. The seemingly obvious conflicts of interest and lack of transparency work to further dilute the meaning and significance of the label.  Still, that is what we have and a better phrase hasn’t popped up yet.  We’ll leave it that eating sustainably can serve as a a road marker to a living and eating ethic. 

So rather than get into a full on scree about what we should be eating, why, where to purchase ( or not) I’m going to offer several guidelines for how I think a well seasoned athlete might purchase the foods they cook and eat.

WP_000428

Things to consider:

1.  Try shopping at a farmers’ market at least once a week.

2.  Buy the things that excite you and don’t be afraid to try a vegetable that you haven’t tried before.  WP_000438

3.  Don’t agonize over organic vs conventional at this point.  While I am a big advocate of organics supporting a local farmer is far more important.  Small(ish) scale farming more often keeps land in agriculture protecting green space.  It promotes a biodiversity of species. particularly pollinators (  see  http://www.pollinator.org/ ).

4.  Shop Seasonal and Local.  It’s about what is freshest and most nutritious.  It’s about looking at your carbon footprint.  It’s about supporting local economies and communities.

WP_0004405.  Try to stay away from foods that are in a bag, box or can as much as possible.

6.  Make as much of your food from scratch.  It’ll taste better and will allow you to better understand and connect with the foods you eat.

So the sustainable athlete, along with any specific dietary restrictions or needs, really can participate in supporting sustainable food systems.  It may take time and practice.  But, hey, that’s what we do everyday.

There you have it.

For further reading and opinions on sustainable eating and sustainable food systems see the Sustainable Ingredients page for useful links and suggestions.

Building Flavors

WP_000326 What makes a dish really tasty good?  Where in the process of prepareing a dish does the magic happen? How can I take a small handful of ingredients of a meal and gussey them up so that I’m smakin my lips and looking for seconds?  Well, here at The well seasoned athlete its time to reveal the secrets. And to be honest, its one part ingredient selection, one part technique and one part intuition.

Ingredients-  Typically I begin preparing lunch, dinner or what have you with some ingredient starting point.  It might be a vegetable, might be a super da kine slab of fish or a great looking cut of grass-fed beef from here in NorCal.  Curiously most of my fellow chefs agree that the starting point when composing menus is a particular ingredient which screams “use me, first!”  Its wicked fresh, speaks of incredible integrity or excits in some way.  Other parts of the menu or dish fall into place after that.  The fridge yields a bag of dino kale, some locally grown almonds.  The pantry holds a spice or two which I’ve been dying to try out.  On this day I happened to have two previously prepared items that were just waiting for the right moment to show their stuff.  One thing to keep in mind is that its okay to enhance an ingredient or two.  Here I’ll show you how.

Technique and Intuition–  Let’s dig into a recent dish I prepared and see how it works. Seared Ahi Tuna, Udon with Mustard Greens, Soy Glaze, Gingerd Carrrots  (serves 2 people)

Here is the line up of ingredients.   Places where we will build flavor will be a. marinade for tuna; b. a light seasoning of the noodles prior to plating; c.tangy salad to accompany the dish and be a foil for the other flavors and textures; d. saucy type thing to hit the tuna with that keeps the taste buds wanting another bite. 

  •  12 oz Ahi Tuna (it can be in one or two pieces)
  • 6 oz Udon Noodles (dried in package ) (note: keep in mind that noodles of almost any kind will double in weight after cooking. So if you’re looking for more carbs then just measure up)
  • 3 oz Young Mustard Greens or Spinach (fresh only )
  • 4 oz Carrot, (peeled)
  • 3 oz Cauliflower or Green Cabbage
  • 1/2 oz pickled ginger (or 1/2 teaspoon fresh ginger grated fine mixed with 2 Tablespoon rice vinegar
  • 1/4 cup Soy (reduced sodium version is ok) mixed with 1 Tablespoon honey, 2 teaspoons rice vinegar, 2 teaspoons hot sauce (your call on brand)

First place for magic: seasoning the fish.  Salt.  After that you can be creative.  Options include, cracked black pepper, chili flakes, zest of lemon or lime ( or combination of), minced garlic, sesame seeds, spice blends such as a North African or Vindaloo work well.  One key is not to get all carried away and throw everything at it.  If its a citrus flavor you are looking for just use the pepper, chile and garlic.  If its the Vindaloo or Indian spice flavors go with the garlic and pepper.  When you use a mix of fresh or dried herbs stick with garlic, pepper and a little citrus zest  .  WP_000323

It was decided that this dish was going include some Udon noodles, simply prepared by boiling. Easy enough, 9 minutes in boiling water, drain.

WP_000324

WP_000325

But here we can add a “behind the scenes” flavor by tossing with a two teaspoons of soy, two teaspoons of oil (olive or saflower), a dash of sesame oil and dash of hot sauce.  A light hand is needed here.  This is only to season the noodles, not make a sauce.  You’ll hardly taste it but the flavor is there and helps set up the palate for the rest of the dish.

Next, the young mustard greens or spinach.  Texture wise we have big flavored but sexy, soft tuna happening, silky noodles, a crunchy, tangy salad lurking ahead.  Traditionally this would call for a wilted or boiled vegetable like our greens.  Fresh flavor, fresh texture but soft and somewhat similar to the noodles.  The greens provide essential nutients, a vibrant color contrast but don’t fight the other elements of the dish.  All we do is give the greens a light steaming for 1 minute. Uncover and leave on the stove off the heat until ready to plate.

Now for the crunchy, tangy salad I mentioned above.  Shredded carrot mixed with chopped up raw cauliflower (or cabbage).  To get this right shred the carrots small.  You can use a box grater, the shredder blade of a food processor (Cuisinart) or a Japanese mandolin.

WP_000318

The cauliflower is just sliced thinly.  No need to make it pretty, its going to fall apart anyway and the thinner the better since it won’t be getting cooked.  (if you end up using cabbage give it the same treatment as the carrots)

WP_000319

pickled ginger I put up last month

Mix the carrots and cauliflower in a bowl and add 2 Tablespoons of chopped pickled ginger and 2 Tablespooons of the pickled ginger vinegar. Allow the salad to sit for 10 minutes before serving  ( Now don’t worry.  If don’t have pickled ginger then simply grate 1/2 teaspoon of fresh ginger and toss with 2 Tablespoons of rice vinegar.  Let sit for a few minutes before mixing into the salad.)

Now its time to pull this together.This is where Intuition comes into play. Timing is important.  Which order do cook everything?

  1. Marinade Tuna.
  2. Prepare Carrot Salad.
  3. Reduce soy, honey, vinegar, hot sauce mix to a glaze. (takes only about 2 minutes in a small non-stick pan)
  4. Steam greens.
  5. Boil noodles.
  6. Cook the Tuna (this can happen while the noodles are in the pot cooking.
  7. Toss Noodles and Greens together with seasonings.
  8. Slice Tuna, plate up the noodles, garnish with sauce and salad.

Bingo!

WP_000328

Nutrition Facts Serving Size  (466g) Servings Per Container

Amount Per Serving Calories 720    Calories from Fat 160    % Daily Value Total Fat 18 g 28 %  Saturated Fat 3 g 15 %  Trans Fat 0 g    Cholesterol 65 mg 22 %  Sodium 1780 mg 74 %  Total Carbohydrate 80 g 27 %  Dietary Fiber 9 g 36 %  Sugars 12 g    Protein 57 g

Vitamin A   350 %  Vitamin C   90 %  Calcium   10 %  Iron   30 %

Weighing the Options

Peeled Squash

Butternut Squash being peeled

Last week I did the Butternut Squash Risotto.  At the time I started with something like a 3 lb squash that happily gave me way more squash than I needed for the risotto.  The choice at the time was to blanch all the squash and save half for something else.  It could have been tossed in the freezer for future reference or just placed on hold for few days until inspiration struck.  We decided on the latter.  So a few days later it was time to put the squash back into action.

Prep for Squash Leek Soup
Potato-Leek-Prepped Squash

A trip to the farmers’ market happily produced three leeks, two russet potatoes and the urge to make soup.  Initially it was to be a potato leek duet but the squash got thrown into the mix.   No problem there.  Now we had a three-way.

First things first.  Leeks are notoriously dirty.  Kinda like your kid brother at age 5.  The strategy here is to trim off the green part just above where the white part fades to green.  Also cut off the root end about a 1/8 inch from the end.  Now wash the leeks well.  Dirt will get in the nooks and crannies around the green end.  Do the best you can then bring to the cutting  board and cut them into a 1/4 or 1/2 inch dice.  For the most part on a soup like this I don’t fuss too much with the sizing and all but habit usually takes over and we end up getting them in a uniform size.  Next I peel and dice the potatoes.  Again a 1/2 inch size is good.  The butternut squash is ready and waiting so its time to cook.

Heat 2 tablespoons extra virgin olive oil in a 2-3 quart pan.  When the oil is hot add the leeks, lower the heat and cook slowly for about 8 minutes, stirring occasionally.  Don’t let them color at all.  When they’re all good and melty add the potatoes and stir together. Now we add the magic.  Today its cardamom 1/2 teaspoon, curry powder 2 teaspoons, and bay leaf 1 each (I like the fresh ones but dried are ok too).

Spices for Soup

Cardamom (ground), Curry Powder, Bay Leaf

Add the spices and a tad of salt to the leek-potato mix. Stir again and let stew for a few minutes so the spices can absorb some of the vegetable love.

Leeks and Potatoes Simmering

Now toss in the squash. Stir. Add 2 quarts of hot water.  Jack up the heat and bring to a simmer for 15 minutes.

Squash added to Soup

Squash, Potao and Leeks together with Water added

Now I had to take pause.  To puree or not to puree.  That is the question.  Lookin at this I thought that its chunky luv looks seemed too good to alter.  At this point we have reached a crossroads of cooking .  In other words we have can several ways to go here.  We can:   a. make this a hearty vegetable stew and add rice or little pasta like orzo.  b. Leave it chunky style which is really about the visuals and the mouthfeel experience of eating a soup with texture. Or, c. we can puree the soup and give it a more uptown treatment.  Pureeing applies a more lux approach to the dish.  Its smooth, feels unctuous in the mouth and looks and sounds more elegant.  You can even top it with a dollop of creme fraiche, sour cream or crumbled feta cheese.  The great thing is that there is no down side to this.  Whatever way it’ll be killer good.  All the same ingredients, same flavors but what’s great is that now you have more than one tool in your kit to build super food.

PureeIn the end a coin was tossed and puree it was.  Lucsious as it should be.  This recipe is vegan by the way.

Here are the nutrition numbers.  Remember that vegetables like Butternut Squash are nutrient dense and combined in a recipe like this delivers high value nutrition.

Nutrition Facts Serving Size  (399g) About  a 10 fluid oz Servings

Amount Per Serving Calories 150    Calories from Fat 45    % Daily Value Total Fat 5 g 8 %  Saturated Fat 0.5 g 3 %  Trans Fat 0 g    Cholesterol 0 mg 0 %  Sodium 450 mg 19 %  Total Carbohydrate 26 g 9 %  Dietary Fiber 4 g 16 %  Sugars 3 g    Protein 3 g

Vitamin A   170 %  Vitamin C   30 %  Calcium   6 %  Iron   10 %

Epic day of racing = Epic day of Cleaning!

Broke out the exclamation point for this one.  As well as the word epic.  The drive to the   CCCX  Race at Manzanita Park near Prunedale began just before 7am in 30+mph winds, sheets of rain and half light.   Kurt and I hung on for dear life car surfing at 30mph on 101.

Arriving around 9am we went thru reg, pinned numbers on, suited up and readied the rigs.  Did two laps of a mostly rideable and long course ( near 2 mi) , pulled off the course and hosed down the bike.  Since it was raining dogs, cats and something else a proper warm up was not a proper warm up.

As cross can be the course had changed dramatically from practice look around to race time.  Several sections became un-rideable, one 50 yard long section went along the first base line of a ball field and unsurprisingly became a 8 inch deep bog of brown the texture of pancake batter only containing hints of green.  Formerly grass.  Not a good race personally with a 5th place finish and feeling like it should have been more.  But that’s racing.  Rolled thru the finish and lined up at the hose for the post race wash down.

Next morning padded down to review the damage.  Every moving part had a scratchy sound coming from it.  Move the brake arms…. scratch, scratch.  Chain…more o’the same.  So began the tear down which only went deeper and deeper.  Bottom end had water inside the BB shell.  Drive side bearings sounded like they needed some attention. Brakes required an overhaul that had me digging around with Q-Tips.   Oh Man!

Rear wheel bearings now need a rebuild.  Well for anyone who races cross I’m preaching to the choir.  A teammate who is new to cross and has a new rig asked for advice for what to service and the following is what I wrote out.  Its December after all.  Racing cross every weekend (sometimes twice) exacts a toll.  Crack open a favorite, program the pod and settle in.  It’s what we do.

There are probably 5 major (depending) places to spend some attention.

1.  Chain  You can do one of two things here.  Take off the chain and slosh it around in a small container of Park Tool Solvent, let it drain then rinse in hot water with a small amount of soap then rinse once or twice in hot water.  Let dry for several hours then put back on bike and lubricate.  Second method requires buying the  Park Tool Cyclone Chain Scrubber chain washer gizmo which is actually pretty good but then you have to buy one.
2. Jockey Wheels and rear Derailleur.  Its possible that the small bearings on the jockey wheels need cleaned and lubed.  Not sure if you have SRAM or Shimano but they should be fairly easy to take off, apart, clean, lube and replace.  Easiest when chain is off.  Just be sure that if the two wheels are designated TOP and BOTTOM that you keep them in that order.;  I know that mine on the Campy set up are like that.
Take a moment to check the pivot points on the rear derailleur (and front) for ease of movement and no crunchy sounds.  I sometimes grab a can of that compressed air that they sell at Best Buy and some Radio Shacks.  It’s really good for blasting out grit in tight areas.  There like $12 or so for two cans.  You can apply a wee small amount of lube to the pivot points.
3. Brakes.  Clean the pads, clean out the grooves on the pads.  If really worn down replace.  The brake arms pivot on small bearings.  Best to take apart (remember the sequence of parts coming off) and clean.  Use a bike grease to apply a thin coating to all areas that move.
4.  Rear cassette  take it off and clean it up like new.  You’ll be surprised how quite the chain will be and shifting will be better.
5.  Crankset and Bottom Bracket-   Best to take the cranks off and clean behind the washers and seals.  Remove crankset and remove water from inside the bottom bracket shell.  (yes you’ll find dirty water there 😦
Clean chain rings well.  The ramps and grooves are there for better shifting.  If they crud up too much then you’ll notice it.  Grease all and put back together.
Depending on experience and tools this can be a couple of hours minimum.  A lot of work perhaps but needless to say that if you have been racing this season and even if you didn’t race in the worst of conditions its time to do an overhaul.  If you had your bike frolicking with the mud puppies over that time its imperative.
May be the difference between a podium or DNF not to mention the life expectancy
of you groupset.ut you’ll at times find things that are either worn, loose or really need attention.

Herb Brined Lamb Riblets, Yukon Gold Potato Salata, Sauerkraut Salad

Its pouring outside and its going to be an epic day of Cyclocross  racing tomorrow.  What with three days big rains and more on the way I needed something to distract me from the deluge out the back door.

One of the joys of cooking is finding neglected ingredients that are affordable.  Quite often these may the over looked root vegetable like celery root or turnips, herbs like Summer savory, or cuts of meat like pork shanks, beef flat-iron or lamb neck.   Among these I’m going to add lamb ribs.  If you enjoy good lamb like I do then grabbing several handfuls of these when they show up in the butcher case are a reason to celebrate.  If the ribs are in one small slab no problem.

Marin Sun Farms Lamb Spare Ribs ready for marinadeYou can simply run a knife down between each one or every other one if you chose.  Either way is fine, they’ll cook up the same.  Juicy and delicious.  But first a bit of marinade is in store.

Like any rib product they benefit from a bit of aggressive seasoning and slow cooking.  For these I  don’t go the sweet and sticky BBQ route but tend to give them an herby treatment with some chile and citrus.  Garlic never hurts as well.  Slow roasting  (see Techniques ) in the oven or grill is the ticket here.

First a we throw together a heady rub of oregano, thyme, fennel, parsley, garlic, black pepper, kosher sat ( for a good primer on salt types go here: foodnetwork kosher-vs-table-vs-sea-salt  ). Add in several teaspoons of fresh lemon zest ( my preference is meyer lemon) and a teaspoon of red chile flakes. Another tasty marinade idea would be mixing about  2 tablespoons of Za’atar with the garlic, oil and salt.  Next muss this up with 2 tablespoons of extra virgin olive oil and rub it in vigorously over all the surface of the riblets.  I like to let them sit for at least several hours at this point, even better over night.  A good trick is Marinade ready to happen.  Can you guess who they areto use a zip lock bag.  This is also a super trick for any type of marinated food.  Easier to store in fridge.

Here are the herbs lined up a ready to go.

Ribs soaking up the luv.

After some time together its time to grill.  Even in the rain the urge to grill can’t be held back.  Use a low heat for these and move the fire to one side with the riblets arranged on the grill on the other side away from the fire.  Put the cover on the grill and let them go for about 20 minutes, turning them over every 8 minutes or so.  Unlike pork ribs you don’t want these fall off the bone done.  They’re going to have a bit of grab to them.  Something like a medium well doneness but not charred. Remember low and slow.

Ribs getting happy on the grill.While we let the riblets do their thing we turn our attention to the rest of the menu.  I chose a very simple warm potato salad.  This is a great fall back for when time is short.  Start with one pound of yukon gold potatoes left whole  (yukon gold history)  in a pot of water large enough to cover them with about 1/2 inch of water (start with cold, please).  Add a half teaspoon of salt and a bay leaf.  Set to boil and cook uncovered until the tip of a knife glides effortlessly through them.  This should take about 18 minutes from the time you turn on the flame.  When they’re tender done drain the water off.  Let them sit in the pot for a few minutes to cool.  When you can handle them cut each one into 1 inch pieces.  No need Ready for Fun!to be a stickler about shape here.  As you dice them up put them back in the pot.   When all are cut up add 1 1/2 tablespoons extra virgin olive oil, 3 tablespoons chopped parsley, a bit of kosher salt and 2 teaspoons of white wine vinegar ( oh heck if all you have is red wine vinegar then that’s okay).  A couple turns of the pepper grinder and its good to go.

Lastly, to round things out I decided to serve it all with a super salad of sauerkraut  (Sonoma Brinery.) and torn leaves of escarole or frisee.  You can use whatever your favorite might be.  And if you don’t have one then now’s the chance to do some research.  Cabbage is your friend.

Nutrition Facts Serving Size  (498g) Servings Per Container

Amount Per Serving Calories 600    Calories from Fat 290    % Daily Value Total Fat 33 g 51 %  Saturated Fat 9 g 45 %  Trans Fat 0 g    Cholesterol 120 mg 40 %  Sodium 1240 mg 52 %  Total Carbohydrate 37 g 12 %  Dietary Fiber 7 g 28 %  Sugars 4 g    Protein 40 g

Vitamin A   30 %  Vitamin C   80 %  Calcium   8 %  Iron   25 %

Grilled Spare Ribs, Alexander Valley Sauerkraut, LIttle Farm Potato Salad

Warm Spinach Salad with Bacon Lardons

Two things that really excite me are exploring farmer’s markets and good cured pork belly.  While these may seem totally non-related it’s the former that quite often provides the inspiration for using the other.  Such it was this past Saturday when I came upon a large mound of spinach a farmer was selling.  These were beautiful small plants cut off at the base so you had these small sprays of arrowhead shaped leaves, crisp and tender.  I grabbed about 6 each.  I think it was under $2 total.

So to round out the Butternut Squash Risotto dinner the other night we put together a salad using the fresh spinach, cubes of smoked bacon and a vinaigrette using some of the rendered fat, olive oil, sherry vinegar and sugar. A classic sweet and sour treatment.  The aroma and flavors resonate back to when I was a teenager in Pennsylvania.

The goal in this dish is to let the ingredients do their thing and get out-of-the-way   Essentially there are only three elements to this salad, the greens, the bacon and a simple dressing.  No need to fancy it up.

A quick rummage in the freezer produced a piece of slab bacon which I sliced 2 ounces into 1 inch x 1/8 inch slabs.  I like a Lardon I can sink my teeth into. First we set the slices into a shallow pan (I use a 6 inch non-stick saute pan) with about  3/4 cup of water and 2 tablespoons of extra virgin olive oil.  Bring this to a simmer and let it go undisturbed for about 10 minutes.

Keep an eye on them.  Eventually the water will evaporate, the bacon will give off its fat, combine with the olive oil and begin to fry itself.  I find this a super way to build loads of flavor into a dressing or sauce.  The end result is a crisped, cooked bacon and a trove of fat/oil that can be used (or not) for your sauce of dressing.  Its okay if you don’t use all of it.  That’s not the point.   Flavor is the point.  So don’t be shy.Scoop out the bacon and keep warm.  Next we add a 1/4 cup of diced onion ( or shallot), 3 Tablespoons Sherry vinegar, 1 teaspoon of brown sugar and bring to a simmer for 1 minute.  Add a few turns from the black pepper grinder (if don’t have one, get it.  Its one of those kitchen essentials).

Best way to finish this one-off is to have a largish stainless steel bowl.  You can use any large kitchen pot or pan if that’s all you have at the time.  No problem.  Heat up the bowl or pan.  Not too hot.  Add 1/2 of the dressing and warm.  Add the spinach leaves.  Toss, toss, toss.  This is a great time to practice using those new metal tongs you save for the BBQ grill. 

Add a low flame under the bowl to keep it warm.  You just want to keep the whole thing warm but not cook it.

If you need a tad more dressing it’s there so go ahead.  Taste, taste and taste again.

Now without a moment to spare transfer the whole thing to a platter and crown it with the cooked bacon pieces (Lardon ).

Never looked so good.  Now sit down and eat.

Here are the nutrionals:

Nutrition Facts Serving Size  (151g) Servings Per Container

Amount Per Serving Calories 340    Calories from Fat 240    % Daily Value Total Fat 27 g 42 %  Saturated Fat 8 g 40 %  Trans Fat 0 g    Cholesterol 55 mg 18 %  Sodium 1240 mg 52 %  Total Carbohydrate 14 g 5 %  Dietary Fiber 4 g 16 %  Sugars 2 g    Protein 16 g   

Vitamin A   50 %  Vitamin C   20 %  Calcium   6 %  Iron   15 % 

:

Risotto- fuel for the fire

More than once I’ve had teammates and friends quiz me on how risotto is made. The comments generally run from.  ” Seems like its complicated.”, “Doesn’t it take a long time to make?” To ” What kind of rice do you use?”  In response I would say no, no and arborio.

Marcella Hazan, the wonderful Italian cook and cook book author describes risotto as a uniquely Italian technique for cooking rice.  In her book The Classic Italian Cookbook she writes “Risotto can be made with almost any ingredient added to the rice… The variations are inexhaustible.”

There are umpteen jillion recipes for risotto out there in print and on the web.  They pretty much have one thing in common, Arborio rice.  There are several variations on this rice but don’t be put off by packages that read Super Fino, Carnaroli, Vialone Nano.  They all can be used to make this wonderfully creamy, luscious dish.  And it takes no more than 20 minutes from start to finish.  Basic ingredients include the rice, a small amount of diced onion, several tablespoons of good quality olive oil, about 11/2 quarts stock and/or water (both boiling or near so) and a generous blizzard of first rate grating cheese like parmesan or pecorino.

What we’re going to show you here is one version.  Its moving into winter here and so we’re going to use a terrific seasonal ingredient, Butternut Squash.  One squash of about 3 lbs in weight will give you enough squash for two meals, easy. Here we cut off the ends, peel it with a vegetable peeler, scoop out the seeds and pulp then dice or cut into 1/4 inch pieces.  They could be cut larger but you want them to a comfortable bite-size and in proportion to the other indredients in the dish.Ends Trimmed and Halved

Peeled
Seeds and Pulp Scooping

At this point since you have enough squash for several meals you could go ahead and cook it all then either freeze or refrigerate what you don’t use first time round.  You can blanch the squash a couple of ways,  Here we chose to roast the squash in the oven.  You can also braise it.  See the techniques page for how to do it.  Season the squsah with a sprinkling of kosher salt, a thin sliced clove of garlic (it could be grated or minced, doesn’t matter) and 1/2 teaspoon of smoked paprika.  This is an ingredient you should have around and if you don’t, get some.  Its super stuff for adding depth to sauces, vinaigrettes, marinades, you name it.

Roasting Squash with Garlic and Smoked Paprika

Next we take the diced onion and saute or sweat it in the olive oil over a slow flame for about 5 minutes until the onion is soft.  Don’t brown it whatever you do.  Doesn’t look good, doesn’t taste good in this dish.

Now we add the hot liquid.  Increase the flame as you do this, something close to a medium flame should work.  Just don’t crank it.  You can use chicken stock (home made is the best) or water.  Of course a bit of stock even if its only half the total liquid will give you lots more flavor.  Not to mention the vitamins and minerals in the home made version.

Liquids get added in several stages.  Add roughly 1 1/2 cup of hot liquid at a time, stirring often.  Don’t let it stick to the bottom of the pan.  A little elbow grease and attention here are all you need.  But don’t hover and stir constantly.  There’s no need to.

Its getting creamy now and at this point its about 15 minutes till being done.  The judge is the bite of the rice.  Its similar to pasta in how you call it.  When you add the last of the liquiid add the cooked squash ( or what ever else you might be adding like roasted mushrooms, cooked and pulled chicken).   Stir to mix and let it go until the rice is ready.  Now you’re good to go.  Even if the rest of the meal isn’t all there yet you have a good 5-8 minutes to pull it together.  Just throw a lid on it and pull it off the flame.


Now with everything done its plate up time.  Here is the full recipe along with the nutritionals.  Remember that recipes are only guidelines.  And don’t be afraid to play with your food.

Butternut Squash Risotto (enough for 3 servings or 2 with leftovers)

1 cup Arborio Rice

½ cup yellow onion, diced small

2 cups roasted butternut squash (or other hard squash or vegetable of choice)

2 Tablespoons extra virgin olive oil

1 quart chicken broth (hot or simmering)

2 cups water (you can use all water or all chicken broth but I like the mix.  Its plenty flavorful and lets the other ingredients shine through) (hot or simmering)

¼ teaspoon kosher salt (you can use sea salt)

4 Tablespoons grated parmesan or pecorino

Heat oil in heavy bottom sauce pan or pot.

Add onion and cook slowly for about 5-8 minutes or until soft.  Do not brown.

Add rice and stir to mix well.

Add stock in 1 ½ cup at a time stirring as you add.  Make sure the mixture is at a good simmer as you go. The rice will absorb liquid as it cooks.  The mixture will soon become creamy in texture which is a good thing.

Continue to add the stock then the water stirring often.

Add the cooked squash or vegetable and stir to mix.  Cook for at least another 5 minutes.  (The whole thing should take around 15 minutes.  Check the grains of rice for doneness by judging if they have a gentle firmness inside as you bite.

When done you can serve immediately or cover and set aside for up to 5 minutes.

Here are the nutrtionals for the dish.

Nutrition Facts Serving Size  (645g) Servings Per Container

Amount Per Serving Calories 530    Calories from Fat 150    % Daily Value Total Fat 17 g 26 %  Saturated Fat 3.5 g 18 %  Trans Fat 0 g    Cholesterol 15 mg 5 %  Sodium 790 mg 33 %  Total Carbohydrate 79 g 26 %  Dietary Fiber 7 g 28 %  Sugars 9 g    Protein 19 g   

Vitamin A   310 %  Vitamin C   40 %  Calcium   20 %  Iron   10 % 

Welcome to the well seasoned athlete

The well seasoned athlete is about how athletes of all types can learn to be better cook and eat well.  Here you will find tips and instructions on how to shop for ingredients, choose recipes, prepare delicious and healthy foods from scratch.  Emphasis will be on ingredients, technique, affordability and ease of preparation.

Useful advice on how you, the athlete, can live, work, train, compete and eat well.  Without breaking the bank.

Cooking for yourself is way cheaper than eating out.  That includes eating takeout.  Anything you buy and eat that is fully or semi-prepared (think frozen, prepared meals, or any convenience food product from top ramen to hamburger helper) is going to hit your wallet much harder than if you shop for fresh product and prepare it yourself.

We will provide nutritional analysis information for our recipes as a reference point for making sure you, the athlete, have the information you need to fulfil your particular training dietary needs.

Why we’re different. 

Look around and you will find almost no practical information on how to feed, you, the athlete well.  Nutrition searches will yield often vague and at times hard to understand info on what nutrients you should be eating.  Not how to find them, shop for them, arrange them into thoughtful, delicious menus and not how to prepare them, step by step.

Many information sources will offer the same boring info on the skinless piece of chicken unspecified fish species, broiled or sautéed, a sorry excuse for a sauce, some whole grain concoction or pasta badly done.  While it may be food its not what we really want to eat.

Here at the well seasoned athlete we will break it down, give the recipe life, context and the encouragment  to eat well, everyday.