Easy Zucchini and Corn Saute

Sautéed Zucchini and Corn with Mexican Oregano and Cumin

WP_20130629_012

Here we are now deep in glorious summer.  Long days, heat, farmer’s markets over flowing with gobs of stone fruit, berries, tomatoes, summer squash and corn.  Here is a quick and hella easy recipe for a sauté of corn off the cob and summer squash (appearing here in the guise of zucchini but feel free to use the yellow version or any of the patty pan varieties as well).  If you’re squeezed for time or just not feeling the motivation to fancy up your dinner this can fit the bill.  Comes together in just minutes with a minimum of ingredients.  Squash, corn, herbs, spices, salt, pepper and olive oil.  Its that simple.

Here is a link where you can entertain yourself with all things squash like, summer squash

One of the attributes of this dish that I enjoy is that it contains nothing but ingredients that are native to the Americas and are pre-Hispanic.  Mexican Oregano is not really an oregano as we understand it.  Our pre-Hispanic oregano or redbrush lippia is a member of the verbena family while those used in Mediterranean cuisines are cousins of mint.  Coupled with a bit of cumin and chili powder Mexican oregano transforms squash, corn or dried beans into a heady, sultry dish that can be more than the sum of its parts.

Be advised that fresh ingredients always work best.  If you feel tempted to add a few other ingredients by all means go for it.  But keep it simple.  My suggestions would be to take a summer red bell pepper like corno di toro that has been roasted and diced. If you’re feeling frisky onion and garlic won’t hurt either.

WP_20130629_017

Sautéed Zucchini and Corn with Mexican Oregano and Cumin

serves 4 as a side dish

  • 3 ears of Corn, kernels cut off the cob (yields about 3 cups)
  • 2 1/2 cups zucchini squash cut into thin triangle wedges (one good sized or two smaller)
  • 1/4 cup extra virgin olive oil (only the good stuff please)
  • 1 teaspoons Mexican oregano
  • 1/2 teaspoon cumin, ground fine
  • 1 teaspoons chili powder (the generic kind is fine but if you happen to have ancho or new mexico chili powders lying by all means use them, alone or mixed together)
  • 1 teaspoon kosher or sea salt
  • 1/4 cup water

Heat a wide, shallow pan and add the oil. Get it hot but not smoking.  Add the corn and cook for 30 seconds over medium heat.  Add the 1/4 cup water and stir. Lower heat to low and cook just until the water is almost gone.  Raise the heat up to medium and add the zucchini, oregano, cumin and chili powder.  Stir and sauté all together until the squash is soft.  Add salt and serve.

Here are the numbers.

Nutrition Facts:

Serving Size  (157g)  Amount Per Serving Calories 210

Calories from Fat 140    % Daily Value Total Fat 15 g 23 %  Saturated Fat 2 g 10 %  Trans Fat 0 g    Cholesterol 0 mg 0 %  Sodium 520 mg 22 %  Total Carbohydrate 18 g 6 %  Dietary Fiber 4 g 16 %  Sugars 4 g    Protein 4 g                      Vitamin A   10 %  Vitamin C   25 %  Calcium   2 %  Iron   6 %

Room Service / Stalking the Wild Morel

A little girl led me into a garage filled with bushels of morels.  She had collected them after school and on weekends, just as generations of Midwesterners had done before her.  ” I know where to look,” she explained…..In their world, what matters is that the woods are still able to produce their bounty – and their parents have shown them where to look for it.  – Raymond Sodolov, Fading Feast

WP_20130608_005

Another round of travel, again in the northern Middle West USA.  As I’ve written before in other posts how farmer’s markets can be many things.  A walk in the woods, a trip to Disneyland, inspiration for dinner, a social event, a barometer of what should be on the table that week.  And more.  I’ve commiserated with many a chef about what a sacrilege it is to pass up the chance to shop, chop, sizzle and snack on local foods no matter where you are.

This time round luck would have us staying in a Hilton Homewood Estate hotel where you get a real fridge, a two burner induction stove top, two pots, one sauté pan, a painfully dull chefs knife and assorted plates and silverware.

WP_20130608_003

Our small, tight and fully engaged kitchenette.

At first glance you think “just what the fuck am I gonna pull together with this lot?”  Kinda like a gauntlet being thrown down.

The gang and I decided to take the dare.

Turning to the internet, probably the greatest resource any chef can have besides a good prep cook, we sniffed out the North Lyndale Farmers Market in downtown Minneapolis.  One of a number of worthy farmers markets in the Twin Cities. Its current incarnation includes a significant presence of clothing, tchotchke sellers, nurseries with god knows more vegetable starter plants of every ilk than I have ever seen.  The experience made me feel like I was in real time Burbees Catalog. Kinda like a like a vegetable gardeners petting zoo.  Sadly the TSA and my friends on Southwest would humiliate me beyond the tolerable should I even attempt to bring home all that I wanted.

So it was on to furnishing victuals for dinner. True locally grown and produced food items were slim pickins by and large and included several cheese producers, a couple of stands with beef, pork, duck, buffalo and attendant sausages made there from.  Some ok, some less so.  In the produce department we found a handful of truck farms showing what you’d find In pretty much any super market, none of it locally grown.

After an extensive tour of the market we turned up perhaps 5 or so actual farmers selling what they grow. To a one their offerings appeared meager centering primarily on spring onions, lettuces, radishes and little else.  Considering the over abundance of rain this spring season this came as no surprise and after a few passes I realized that I should not expect to see much more than what I had already seen.   All but one of the farmers stands were of Asian heritage, most likely I figured they from the Hmong community that settled near there to farm several decades past.  Having visited with a similar Hmong farming community near Fresno, CA and researched a bit of their history  I greatly appreciate their talents and dedication to farming the land. They hew to tradition in what they grow and most often you’ll discover great things at their stands.

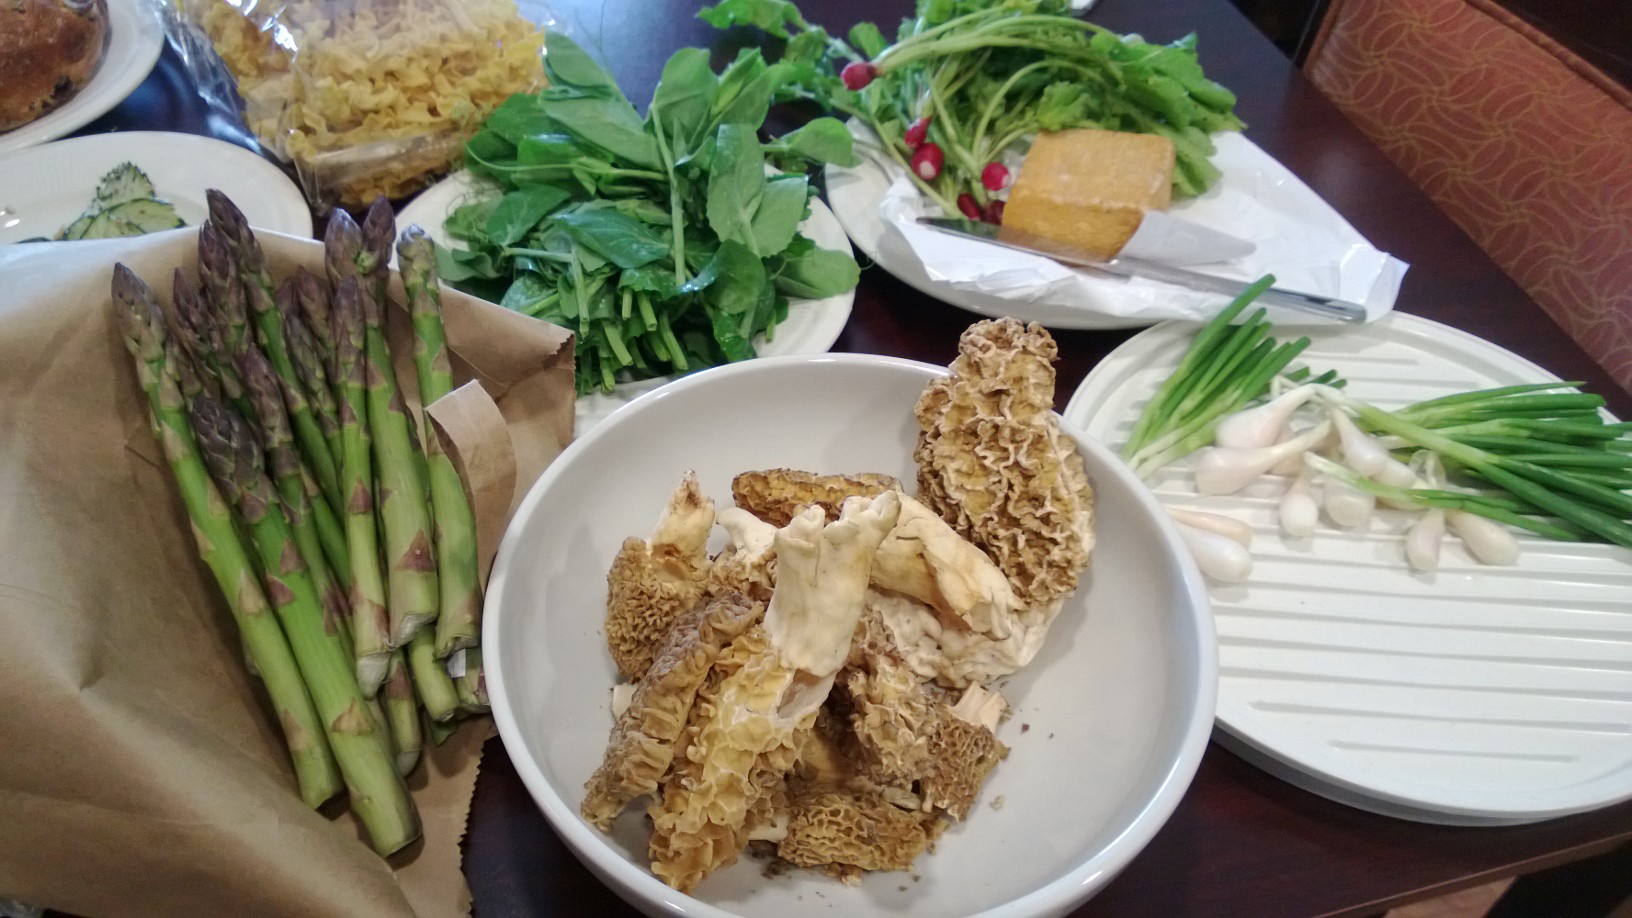
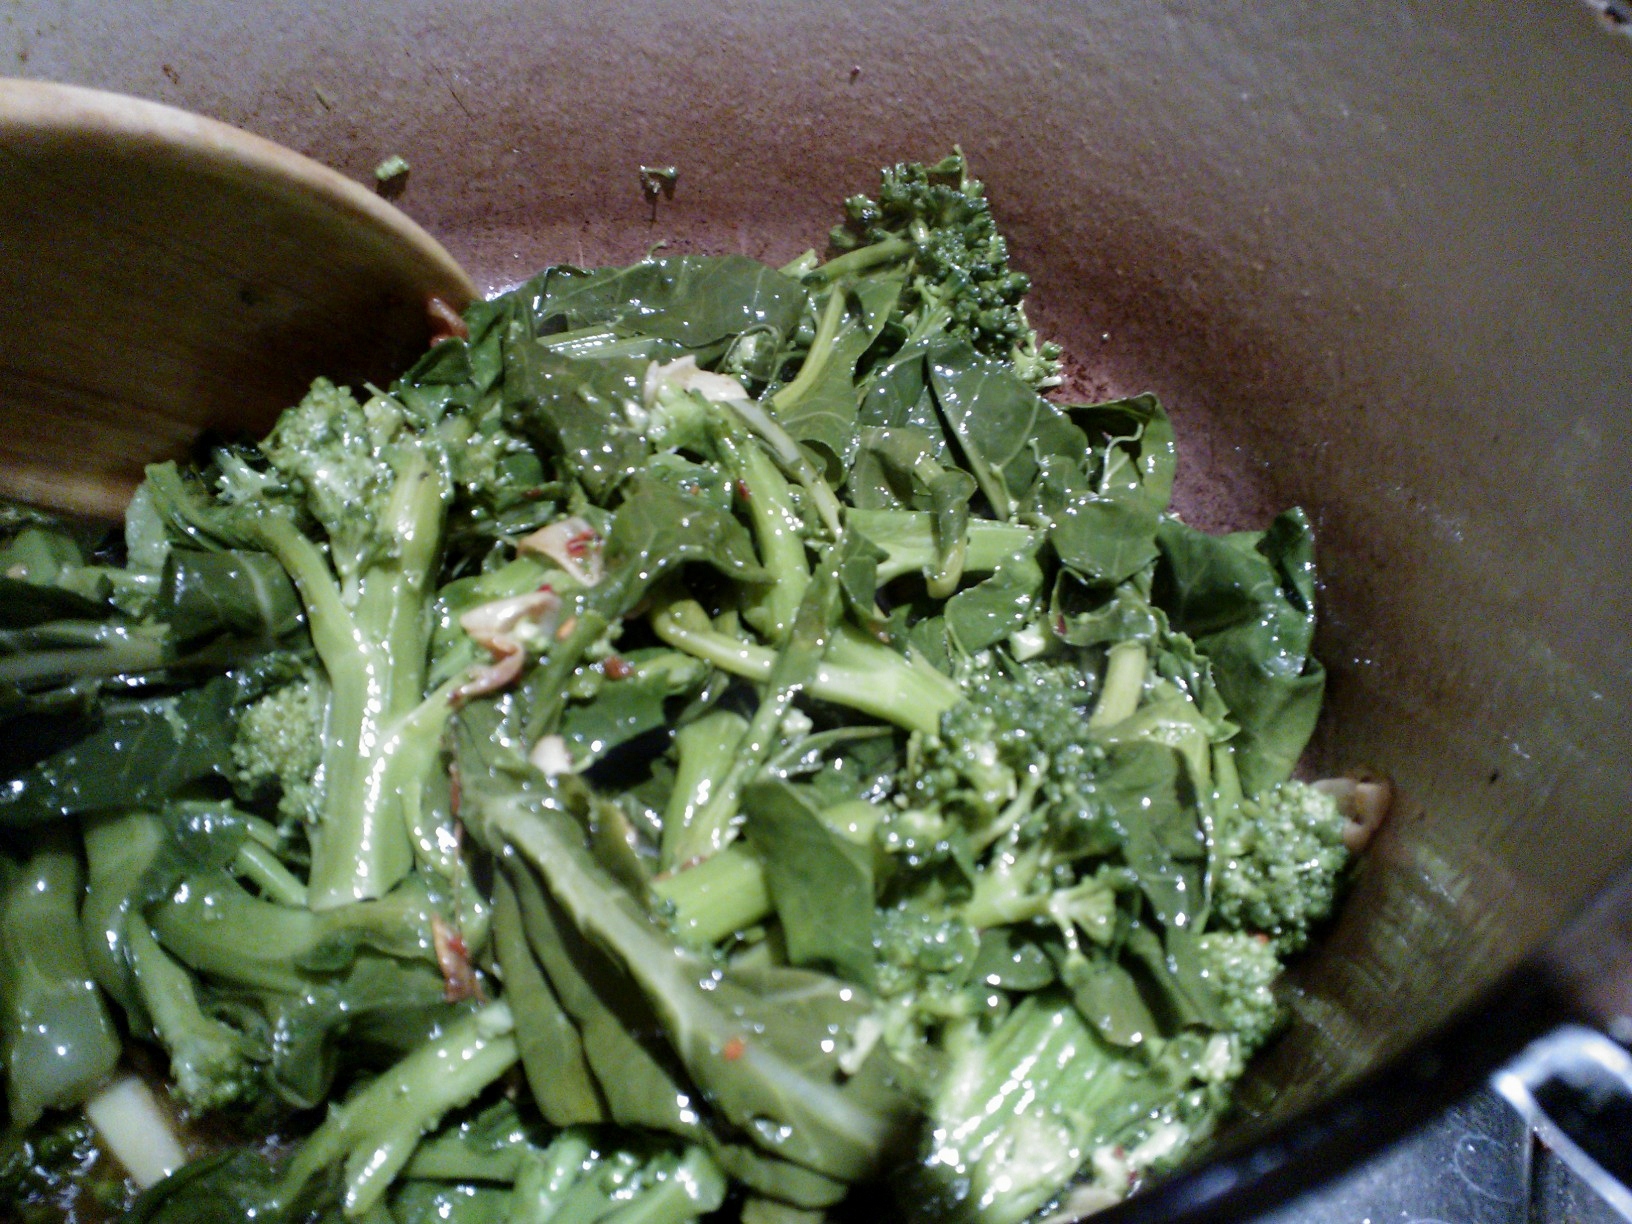
Dean, Terri and I conferred and tried on ideas for the dinner meal to be prepared. A bunch of spring onions, just beginning to bulb out a bit.  Next a bit of lettuce for salad. The find of the moment happened to be a farmer with half a dozen bunches of pristine pea shoots.  Those trimmings from youngish snap or snow pea plants can be quickly steamed and flavored with ginger and garlic, a dash of soy too, even a few chili flakes.  I scooped up a bunch along with some radishes. The menu was beginning to coalesce.

Further down one aisle, near the center of the market was an asparagus farmer. Arranged on the table were squat, handled brown paper bags filled with 3 and 2 lb weights of trimmed asparagus. A fellow working the stand pulled asparagus spears from a box and handed them out to people as they stopped to look-see.  Now I don’t want this to sound trite or quaint like just another over excited foodie chef spouting superlatives at the drop of a tomato but…….. this was (in more years than I care to admit) the best, THE BEST danged, freshest, sweetest asparagus I had ever tasted.  So friggin fresh it carried that high sugar mouth feel and super crisp snap that only something just pulled, plucked or picked can possess.

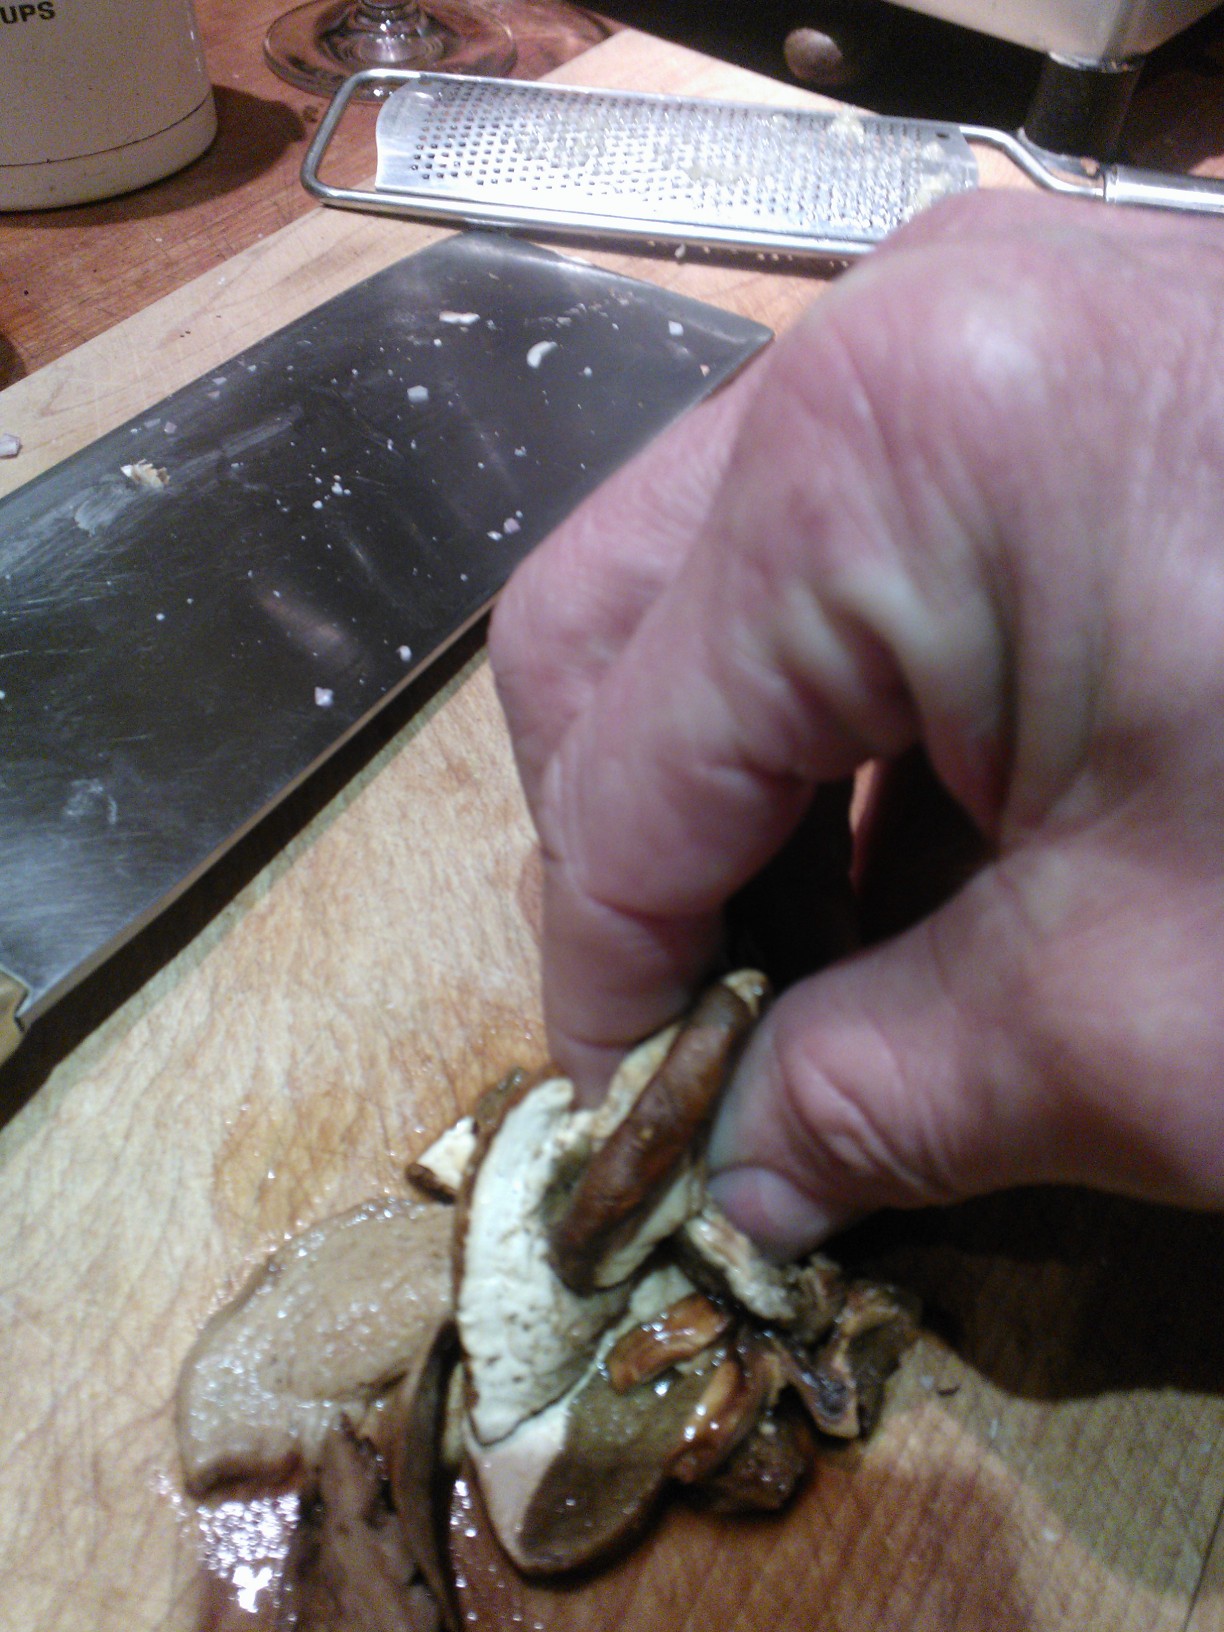
What really drove me to scour the market were locally foraged morel mushrooms.  Generally a rite of spring in the north Midwest and Western states this mushroom is a bit different than its many cousins. Our friends at Wikipedia who seem to have a listing for darn near everything offer that ” the genus Morchella is derived from morchel, an old German word for mushroom, while morel itself is derived from the Latin maurus meaning brown.”  There, now you know. Its distinct conical shape, heavily convoluted sets it apart from other mushrooms and the flavor leans towards woodsy with high notes of complex mushroom that you most often experience thru the olfactory senses as you exhale when eating them.  Delicate but pervasive. Awesome with a medium weight but developed red wine, and good company.

Lastly we stumbled upon a smallish locally based producer of pasta.  The menu was set.

WP_20130608_004

  • Pasta with morels and pea shoots, crisped spring onions, ham, fromage blanc
  • Grilled Asparagus and Calcots (spring onions in Catalan)
  • Radishes and Alemar Cheese Company Good Thunder
  • Miche Bread by Rustica Bakery

WP_20130608_006

A few words about the preparation of the meal.  Despite having the ability to sauté, stove top braise and boil, some seemingly common place kitchen tasks took on the guise of a kitchen rubric,. For example washing and drying the salad greens required invoking the – use the extra bath towel rule.

WP_20130608_002

Salad lettuces toweling off.

Juggling burners for various parts of the meal included:

  • infusing a particularly lackluster olive oil with the tops of the spring onions to gain a bit more umph for the dish
  • a few of the said onions were pickled in a savory brine of vinegar (since we had extra for the salad), water, sugar, salt and pepper ( in those sad little packets available courtesy of room service)
  • bits of some ham were crisped as a flavor garnish for the pasta
  • same for the some of the spring onions as we slow cooked them to a warm, crunchy goldenness.
  • Then on to the morel sautéed with a dash of white wine and lemon while the pea shoots were quickly steamed and held at the ready.
  • Asparagus grilled thanks to Dean and the hotel’s patio grill.
  • Pasta was last up and needed two pots and two burners.
WP_20130608_007

Pasta almost ready!

Amazingly the kitchen brigade included a colander!  Ho fortunato!

Here is the money shot of the main course with recipe below.

WP_20130608_009

  • 10 oz dried papardelle pasta
  • 6 oz morel mushrooms
  • 1 bunch (about 6 oz) pea shoots (you could sub snap peas or snow peas)
  • 6 spring onions, washed, roots and tops trimmed off and the bottoms sliced thin
  • 4 oz smoked ham (optional) julienne
  • 4 Tbsp fromage blanc (optional: grated parmesan)
  • 1/4 cup extra virgin olive oil
  • 3 Tbsp white wine
  • 1 tsp grated lemon zest
  • salt and pepper to taste

Begin by cleaning the mushrooms.  Cut in half and rinse quickly under running water to remove any dirt and creepy crawlies that may lurk within. It happens so don’t be buggin out.  Warm 1/4 cup olive oil in a pan with the onion tops and leave over a very low heat for about 10 minutes.  Remove from heat to let steep.  Heat 2 Tbsp of the infused oil in pan cook the sliced onions over a slow heat stirring occasionally. Do these really low and slow so they gradually go from white to translucent to golden.  Scoop them out and set aside.  They’ll crisp up nicely as they cool. In the same oil as the onions treat the ham as you did the sliced onion.  Shoot for a medium dark, crispy, crunchy texture. Hold aside for later. Saute the cleaned morels in the onion infused oil (about 4 Tbsp worth).  Let them go over a medium heat. Like most mushrooms they will release their juices which will then reduce away. Add the lemon zest.  When they are almost dry add the white wine and season with salt and pepper.  Reduce to sec and set aside. While the mushrooms are working steam the pea shoots in a tiny bit of water with salt.  Wilt them down until soft and tender, about 1 minute. Lastly crank up the water and cook the pasta.

To assemble it goes like this:

  1. Add the cooked morels to the pasta in the pan with several tablespoons of the pasta water and return to stove to warm through.
  2. Fold in the cooked and still hot pea shoots.
  3. Plate up and garnish with warm crisped ham, caramelized spring onion and a tablespoon or so of the fromage blanc.

Here are the numbers.

Nutrition Facts Serving Size  (277g)

Amount Per Serving Calories 490    Calories from Fat 170    % Daily Value Total Fat 19 g 29 %  Saturated Fat 3.5 g 18 %  Trans Fat 0 g    Cholesterol 150 mg 50 %  Sodium 720 mg 30 %  Total Carbohydrate 58 g 19 %  Dietary Fiber 6 g 24 %  Sugars 5 g    Protein 17 g

Vitamin A   20 %  Vitamin C   70 %  Calcium   10 %  Iron   45 %

WP_20130608_011

Fava Beans, Chickpeas, Spring Onion Salata

Fava Bean Chickpea and spring onionHear that sound?  That snapin, popin sound?  Right now its fava time. That’s the sound of fava pods being broken open and those beauteous orbs of flavor hitting the bowl.  If you grow some in the backyard my hat’s off to you.  Here in the Bay Area we plant them in November and let them grow, ever so slowly, over the winter.  My experience is that they have a terrific germination rate (near 100%) and require little or no watering.  Come late April you’ll be blessed with an amazing crop of beans.  There is no downside to this.  Maybe the easiest thing you’ll every grow.

Many folks cringe and complain about the prep.  Shucking, blanching, slipping out of the inner skin.  Honestly its worth the effort.  Many hands make lite work.  Get a partner and you’ll be done in no time.  We bang out cases of these in restaurant kitchens without any thought.  Its spring, this is what’s at market, this is what we cook, what we serve and eat.

Here is one of many dishes we’ve been serving up this year.  There are several important things going on here.  First you’re eating with the seasons.  Two, the combination of fresh and dried legumes gives you a nice protein boost to your meal. (Around 12grams per serving)  The onion salata while also being uber-seasonal provides a great counterpoint to the beans and adds tons of flavor with very few calories.  And this dish is vegan as well as gluten free.

Serves 4 people as a side dish or six as an appetizer.

  • 1 lb fava beans, prepped, blanched and slipped out of their inner skin.
  • 1 1/2 cups cooked chickpeas (garbanzo beans)  Start with 1/2 cup dried.  Cover with plenty of water, bring to simmer and let cook slowly for 1 1/2 hours until soft.  Drain and set aside.
  • 2 spring onions, washed, trimmed and sliced very thinly.(about 1 cup with out the greens)
  • 1 tablespoons chopped olives (green or black just make sure there good)
  • juice of 1/2 a lemon and its zest (1 1/2 tablespoon juice)
  • 1 tablespoon chopped parsley
  • 2 teaspoons chopped mint
  • 1/4 teaspoon kosher salt
  • fresh ground black pepper
  • 1 1/2 tablespoon extra virgin olive oil
  • 1/2 cup water

In a small bowl combine the thin sliced spring onions, chopped olive, parsley, half the salt and black pepper with the lemon zest and juice.  With your fingers separate the rings of the onion.  Set aside and let sit for 20 minutes or so.

spring onion salata

In a large sauté pan combine the cooked chickpeas with the water and olive oil.  Bring to a simmer.

fava bean and chickpeas

Cook for about 2 minutes over a lowish flame.  Next add the prepped fava beans and toss, toss, toss.  Warm up together

When hot add the rest of the salt to season.  Turn out onto an attractive bowl and garnish with the spring onion salata.

Easy as pie.

Here are the numbers.

Nutrition Facts Serving Size  (231g) Servings Per Container

Amount Per Serving Calories 270    Calories from Fat 90    % Daily Value Total Fat 10 g 15 %  Saturated Fat 1.5 g 8 %  Trans Fat 0 g    Cholesterol 0 mg 0 %  Sodium 200 mg 8 %  Total Carbohydrate 34 g 11 %  Dietary Fiber 10 g 40 %  Sugars 5 g    Protein 12 g

Vitamin A   10 %  Vitamin C   70 %  Calcium   6 %  Iron   25 %

the well seasoned athlete goes cycling in minneapolis (in what seems like the dead of winter)

WP_000764

David, yours truly and Randall looking a bit damp, chilled and glad to be on the tail end of a day in the saddle.

Last month I spent the better part of two weeks in Minneapolis, Minnesota.  Since scheduling had me there over a weekend I hit the web and set up a bike rental and dig around for a group ride to hit up. Julie, a dear friend and expert bike fitter for Specialized bikes clued me into Eriks Bike Shop over in Dinkytown, right across the  mighty Mississippi River from downtown Minneapolis.

A few well spent minutes on the web had me locked and loaded on a Specialized Secteur for two days.  A few more key strokes led me to the Twin Cities Bike Club ( TCBC website and calendar) and their club ride calendar.  The advice here is to pack your riding kit (remember to research weather conditions, better yet bookmark that and follow it the week before you land) .  Late March pretty much every where can be a mixed bag of weather.  Cool, very cool, wet, sunny, warm(ish) or not.  Layering is the concept.  Bring your shoes, pedals and helmet.  Remember to take some important measurements from your bike set up.(another good reason invest in a proper bike fit)  Seat top to Bottom Bracket (or pedal ), seat to center of bar, seat to controls.  This will allow you to best approximate some of the geometry you’re come to know on your own bike.

As it was the bike shop I had picked was a modest 20 minute stroll from the hotel, Eriks Bike Shop over in Dinkytown, across the Big Muddy from where I was staying.  The staff at Eriks were awesome.  Super accommodating.

WP_000773

Totally in tune to my intent and motives.  Did the requisite signing of the waver and monetary transaction (bike shops will charge your card with a value for the bike which is completely refundable when you return it- unscathed.  If you have any trepidations read the contract and fine print).  Shawn swapped out the pedals with mine, adjusted and tweaked the set-up with the measurements I gave him (cm and mm please-  that is how we measure it right?)

Though the calendar showed we had crossed the threshold into spring on the ground reality said something else.  Harsh winds that cut to the bone and temperatures that went from early morning teens to afternoon low thirties (Fahrenheit) were real time conditions. That West Coast clime I’ve accustomed to left me reeling and second guessing that early AM roll out.

WP_000770

My rented Specialized ready to rock (and roll)

Saturday showed up blustery, occasional bouts of light rain and…. well lets just say it was f’n… cold too.  The ride calendar called for an 8am rendezvous at Dunn Bros. Coffee on East Lake near the Big Muddy (Mississippi River).

WP_000769

Ride leader for the day was Randall Huskamp of the TCBC.  ( Twin Cities Bike Club )   We started as a group of six in a pitter patter of rain and cold.  I felt less like a fish out of water as I noticed the guys in the group were rugged up pretty much like I was.  Rolling out along the Mid Town Greenway spinning a quick cadence provided the best defense against the frigid and damp morning.  Sections of the Greenway are made up of a long ago abandoned railroad right of way that traversed the city.  Forward thinking city planners and local bike advocacy  groups worked to create a smoothly paved and groomed bikeway that stretches for miles.  One of its landmarks is the Hiawatha Bridge  designed by Martin Olav Sabo.

WP_000767

A graceful suspension bicycle span over the railroad tracks provides a lyrical focal point on the skyline.

WP_000768

Well designed and beautiful to ride.

The greater Minneapolis area boasts something like 90+ miles of bike lanes and share-ways as well as a whopping 85 miles of dedicated bikeways.  During my several days of riding there I can attest to how extensive it is as we rolled through many a mile on our routes.  Riders can either stay on the marked bikeways or use them to get outside the city limits and into the surrounding countryside as we did on our ride out to  Lake Minnetonka. Minneapolis boasts major props by a number of polls and publications like http://www.walkscore.com/bike. Bottom line is that this is one bike friendly city and place to be.  And the riding is super.

The guys had a 60 mile ride mapped out.  One realization was that the stories about town and city limit sign sprints are true.  I swear every time I looked up there was another mad dash sprint for one. Gotta keep on your toes for this kind of mid-west riding.  One I have to say is that its a good way to get your sprint on.  I think I came away with a couple of seconds at best.  Whew!

One thing I came away with is that its kinda flat out there in the middle of the US of A.  Lots of false flats, short hillocks and longish ramp like sections to the terrain.  Coming from the San Francisco Bay Area where climbing is a part of swinging a leg over a bike this was a bit of a change.  Considering the travel, work schedule and such that was all okay with the legs.

After nearly 60 miles of riding in and out of the rain, the cold and wind it was good to sit up and soft pedal back to the hotel.  Long hot shower, a bit of grub and good to go.

Here are several take-aways from riding Minneapolis.  First is that the riding there is top notch with no reason not to take advantage of the options.  Second, cycling is alive there and there are a lot of friendly folks to meet along the way.   Lastly, never under estimate weather.  You’ll thank yourself for it later.

Family Meal- with Sriracha

WP_000737More than once during the string of years I’ve toiled in restaurant kitchens friends or acquaintances bring up the matter of “what do you eat when you work?” or “you guys must eat really well.”  Regarding the former, “everything and anything”.  As to the former “not really” or “sometimes” or “actually don’t think about most of time.” Its a lot sampling, munching on this or that. A particularly endearing carrot or radish, ah, a smacking good trimming off a roasted joint of meat, and that bodacious local cheese that just came in the door. Don’t get me started on cherries or berries in season.

Actually most often we end  up scarfing down a plate of food between setup and service, its called Family Meal in restaurant parlance. Each day, each shift its someone’s responsibility to pull together a couple of dishes for all the staff, front and back of the house.

Ideally its got to adhere to a short list of criteria.

  • Use up what the sous or chef say is okay to use.
  • Pull it together in an hour or less ( this for anywhere from 6 to 25 people).
  • Make just enough, not too much (the chef will get pissed that you’re wasting good ingredients, not matter how dog eared or plentiful they may be)
  • .And if you make too little, oh god the chef will have your head, as you scramble to pull something more together on the fly.
  • Finally your peers will find a special place in their hell since they will have to pick up you sad sack of slack as you fall behind in your prep to set up for service.

As I fixed the post-ride lunch today I had to snicker and write this.  Left over pasta, left over braised broccoli shoots, poached egg, Sriracha sauce.

Quintessential family meal fare.  Really not because its was anything left over, not that it was pasta, with a bit of vegetable, with an egg.  It was all that and.  Srirachia Sauce.  That’s what made it.  Peak inside any kitchen at 4pm and you’ll find a huddle of cooks and chefs scarfing down what was, what is of the moment from  the walk-in fridge.  Methodically, religiously, purposefully doused with Sriacha.  Its what keeps America’s cooks in gear.

Taking your Pulse – North African Spiced Grain Salad

Lentils and Grains

In case you didn’t know whole grains, legumes and pulse should be in your diet.  Okay, that’s besides what’s in the your favorite beer of the moment.  And let’s be real here.  Like most I do like some of my grain intake in a fermented, liquid form but it does not have to be all crunchy, granola-y or boiled brown rice.

The world of grains has many faces, Farro, wheat, rice, barley, millet, rye and corn for a short list.  Legumes include beans of all ilk, black, white, red, Hutterite, Jacobs cattle, scarlet runner to name a few. Pulse however is just another word for Legume or bean which derives from the Latin, puls and from ancient Greek, poltos (which means a meal of a stew thickened with beans or legumes). And there you have your word of the day and extra points in Scrabble.

From a culinary viewpoint these ingredients offer a range of flavor advantages.  Grains like Farro have a nutty complex flavor with hints of oat and barley.  Barley, meanwhile is mellow, grassy flavored with an almost creamy mouthfeel and subtle floral undertones.

Pulses or Legumes are 20 to 25% protein by weight, which is double the protein content of wheat and three times that of rice.  Pulses(or beans/ legumes) are generally pretty high in protein, and the digestibility of that protein is right up there too.  Interestingly, they are often relatively poor in the essential amino acid methionine. Grains (which are themselves deficient in lysine)  which is why slotting them into your weekly menu together helps to form a complete diet of protein.

And so this little culinary journey leads us to today’s recipe which is inspired by Mourad Lahlou’s recent New Moroccan cookbook.  While you scramble for the pantry keep in mind three key points for this recipe.

  1. Its hella nutritious.
  2. Its vegan.
  3. And its delicious.

North African Spiced Grain Salad     (serves 6)

  • 1 cup Brown Rice ( I like to use the brown basmati rice that can be found in stores like Rainbow Grocery here in SF or at other stores like Whole Foods)
  • 1 cup Barley
  • 1 cup Green French Lentils  (these are the dark green ones that hold their shape nicely when cooked – not their light-colored cousin that we use for Split Pea soup a personal favorite of mine)
  • 2 cloves garlic, minced or chopped fine (remember the microplane)
  • 1 teaspoon kosher salt
  • 3 teaspoons Ras el_hanout   a heady mixture of spices from north African regions.  There are many variations and you can just as well do one yourself.  There are many decent versions on the web.  Here is on. Assemble spices then grind together as finely as possible in a spice grinder (actually we use coffee grinders for this in kitchens and simply sift out any large pieces.)  (In  a pinch you can substitute 1/2 teaspoon cumin seed, 1 teaspoon coriander seed, 1/8th teaspoon whole black pepper, 1/8th teaspoon whole fennel seed- lightly toast these in a saute pan for a minute or two until they become fragrant then grind together and mix with a pinch of nutmeg, cinnamon and 2 teaspoons mild chile powder.)
  • 1 bunch parsley, chopped
  • zest  and juice of 2 lemons
  • 2Tablespoons extra virgin olive oil (use the best you can afford-always!!)
  • 1/4 cup onion diced small.
  • 1/2 cup black olives (optional) pitted and chopped large pieces
  • 1/2 cup pistachios (or almonds) lightly toasted and coarsely choppedChopped Parsley

Onion, garlic, olive, nuts

The hardest part of this is that you have to cook the lentils, rice and barley separately.  Place each in a small separate pot.  Add 21/2 cups water and bring to simmer. Cook each until done.  This will take approx 20- 22 minutes for the lentils and approx. 15-18 minutes for the barley and rice.  Take care not to over cook so taste them several times towards the end of the cooking time.  Time will vary a bit.  When done drain each of all water and let let in a colander for a few minutes then combine in a large bowl.

Cooked Grains

In a small sauce pan heat the olive oil.  Add the onion and garlic and cook slowly for 3 minutes stirring occasionally.  Next add the Ras el_hanout and stir well.  Let this cook slowly for a minute then pull off the heat and pour over the grain, rice, lentil mix.  Stir in then add the lemon zest, juice, salt and chopped parsley.  Lastly add the olives and chopped almonds.

Spices in Oil

Ras el Hanout mixed in the olive oil

Seasoning the mix

Addding spiced oil mix to cooked lentils and grains.

Serve this as a warm or room temperature salad with a range of dishes be they vegan, vegetarian or not.  At my house I will serve this with a winter squash tagine, grilled or roasted fish, pork or poultry.  Serve with a light, fruity red wine like a Sicilian Frappato. Or perhaps a locally brewed Saison style beer.

Finished Salad

Nutrition Facts Serving Size  (289g)

Amount Per Serving Calories 460    Calories from Fat 130    % Daily Value Total Fat 14 g 22 %  Saturated Fat 1.5 g 8 %  Trans Fat 0 g    Cholesterol 0 mg 0 %  Sodium 420 mg 18 %  Total Carbohydrate 71 g 24 %  Dietary Fiber 12 g 48 %  Sugars 2 g    Protein 14 g

Vitamin A   20 %  Vitamin C   25 %  Calcium   6 %  Iron   20 %

Building Flavors part 2- Roasted Black Cod with Porcini Mushroom Sauce

Pan Roasted Black Cod, porcini mushroom sauce, pickled shallot, thyme

Last month in the post Building Flavors  we worked through a dish of Ahi Tuna, Udon and braised greens with a spicy soy and ginger sauce.  Since we had such interest in the dish and the idea of adding flavors to a dish and ingredients we’re going into round 2 of Building Flavors.

This time we’re going to stay with the seafood theme for the main ingredient and fiddle around with the sauce that goes with it.

For the fish part of this dish its going to be Black Cod aka Sablefish. Here is we go off a bit about what we eat and why. Black Cod is  a terrific, unctuously flavored and textured fish that works equally well for roasting in the oven or on top of the stove in a saute pan.  It also will give excellent results when steamed or poached.  Because the fish live deep in the cold waters off the north Pacific Coast its flesh possesses a good amount of natural oil which translates to a beautiful  moistness when cooked.  (Note: this moistness means its easier to cook without worrying about drying out it it sits in the heat a little too long.)   Another big plus is its rated Best Choice  by the Monterey Bay Aquarium Seafood Watch Guide.  Essentially this means that the species’ population is in good shape and abundant due to the good and efficient fish stock management by both the fishermen and government agencies.  As today’s fish market have more than  their share of pitfalls and questionable choices having a seafood that rates this good is…..a really good thing, especially for the fishermen.  Eat this fish with a clear conscious.

Now let’s get cooking.  This dish will take you about 15 minutes to pull together.

WP_000504

Serves 2

  • 12 oz Black Cod filet (divided into two 6 oz pieces, bones removed)
  • 4 oz medium regular mushrooms sliced thin (white or brown is fine)
  • 1 clove garlic, minced or chopped fine( a microplane works super for this)
  • 1/2 oz dried Porcini Mushrooms soaked in 2 Tablespoons warm water (shoot, if you happen to have fresh then hey, use them for sure)
  • 2 sprigs fresh thyme
  • 2 1/2  Tablespoons extra virgin olive oil
  • 1/4 cup white wine
  • 1 cup chicken or vegetable broth
  • 1 teaspoon fennel seeds
  • 1/4 teaspoon kosher salt
  • 1/8 teaspoon black pepper fresh ground
  • 1 shallot, peeled and diced small
  • 2 Tablespoons white wine vinegar

WP_000506Timing for this dish goes as follows.

  1. Season Fish
  2. Prepare and Cook mushroom sauce
  3. Pickle shallots
  4. Cook Fish
  5. Reduce/ finish sauce and plate

First pre-heat the oven to 400F.

If the filets are a bit large trim them to 6 oz pieces.  You will find a line of bones down the middle of the front third of the filet.  Trim these out by cutting a V shaped cut around them.(you can also have your fish counter person do this for you).  Season the fish with the crushed Fennel Seed. kosher salt and fresh ground black pepper. Set this aside while the oven heats up and we get the sauce going

In a small bowl mix the diced shallots with the white wine vinegar, a small pinch of salt, a small bit of black pepper and 1 tablespoon of the olive oil.  Let this sit and marinate as the rest of the dish takes shape.

.WP_000505

Next its sauce time. In a large bowl combine the sliced mushrooms, minced garlic, thyme, 1 1/2 Tablespoon extra virgin olive oil, a pinch of salt and black pepper

Heat a sauce pan or non stick saute pan heated over medium high heat to get it nice and hot.  Add the musrhooms to the pan and cook over a medium high heat for about 3 minutes stirring occasionally.  We want to get some color on them that will help develope a richer flavor.  Think Umami.

WP_000513

While the mushrooms are cooking pull the soaking dried porcini mushrooms out of the liquid and chop up into small pieces.

WP_000510

Add the chopped porcini to the pan with the rest of the musrhooms and give a stir.  If it looks like its going too fast for you just turn the heat down low.

Next add the white wine.  Let the wine cook down till it pretty much disappears.  Next add the  soaking liquid from the dried mushrooms and the stock.  (Note:  If you are so inclined this is where you could add a 1/4 cup or so of a rich meat stock or demi.  One trick we do in restaurants is to make a small stock of mushrooms, onion, carrot and celery with thyme.  This can be reduced down and strained and saved for occasions like this)

WP_000514

Soon you’re going to enjoy the heady aroma of wild, forest mushrooms filling the kitchen.  Reduce the heat on the pan and let it simmer slowly while you finish the fish.  There, sauce is almost good to go.

Now we cook the fish and get ready to have dinner.  Heat a 8 -10 inch non-stick pan.  Add 1/2 tablespoon of the olive oil and swirl the pan to coat.  Slide the Cod filets into the pan and keep the heat at medium high.  Place the pan with the fish in the oven.  Roast the fish in the oven for about 3-5 minutes depending on the size of the filets.

When the fish is done pull the pan out and let it rest for 3 minutes while you finish the sauce and pull togther any side dishes. Using a wide flat, spatula transfer the cooked fish to your dish.  Spoon out the mushrooms over the roasted cod.  One of the tricks here is not to just dump the sauce on the fish but to actually “spoon the musrhooms” on top of the fish leaving the mushroom liquid in the pan.  If its a bit too thin you can give it a quick and furious blast of heat to reduce it down to a glaze like texture.  Then spoon the reduced liquid AROUND the fish in a drizzle.  Its gonna look way cool.

WP_000516WP_000517

Next spoon a teaspoon or so of the pickled shallot mix around the fish in several places on the plate.  The idea here is that the sharp bite of the pickled shallot will cut through the richness of the cod and mushrooms.  I like to add a few torn leaves of radicchio or cress to the plate as a counter point on the palate.

Serve with some roasted potatoes or a grain like farro.

WP_000518

SWEET POTATO VEGGIE BURGERS!

YUM!!!

Today I’m featuring a really tasty burger.  Anne Guzman from the Peaks Coaching Group graciously granted permission to re-post it here.

All burgers aren’t created equal.  Apart from the greasy, fat laden to the lean and not very interesting a host of styles abound.  There are the meat centric kind like the grass pastured beef version at  kronnerburger here in the Mission in SF.  Also you’ll discover supurb versions made using ingredients like tuna, mushrooms, tofu, blackbeans or other whole grains. Here is a great idea putting sweet potatoes to good use.  Sweet potatoes and yams fall into the super food category.  They deliver heaps of vitamins A and C as well a the requisite carbohydrates a starchy tuber contains.  Along with these they supply big bang for the ounce of the athlete’s essential minerals; potassium, magnesium and calcium.  They shold be in your diet.   If not here is a great way to start.

Here’s a great alternative to a heavy meat burger! Give it a try this weekend! It’s pretty simple! Spice it up however you like!

Ingredients:

  • 2 cans cannellini white beans, drained (Each can is 1 3/4 cups drained beans with Progresso beans) (Cannellini beans are large and have that traditional kidney shape. With a slightly nutty taste and mild earthiness, they have a relatively thin skin and tender, creamy flesh).
  • 1 large sweet potato, baked/peeled/mashed (about 2 cups)
  • 2 Tbsp tahini (sesame seed butter)
  • 2 tsp pure maple syrup
  • 1 tsp lemon pepper seasoning OR Cajun seasoning (or another fave spice!)
  • 1/4 cup wheat flour or brown rice flour or gluten free flour (there are some good pre-made gluten free flours on the market now)
  • Optional: additional seasoning (whatever you have on hand – I used a few dashes cayenne, black pepper or chilli pepper)Salt to taste if needed
  • Panko crumbs (you will dip each Pattie in the bread crumbs, about 1 cup total)
  • Olive oil for pan- lightly oil just to avoid sticking
  • 2 whole wheat buns or gluten free buns
  • 2 avocados for toppings
  • TOPPINGS TO CONSIDER!!! Dijon mustard, pickles, onions as desired OR you can use a mango chutney and roasted red peppers as toppings.

Directions:

1. Bake sweet potato. Peel, place in large mixing bowl. 2. Add drained beans to mixing bowl. Mash beans and potato together. (you can use a food processor or a fork) 3. Mash in seasoning, flour and any additional seasoning. Your mixture will be quite soft and moist,but you should be able to form a patty. Add more flour or a scoop of breadcrumbs – or dry rice to thicken the mixture if needed. 4. Heat 1 Tbsp oil in a pan over high heat. 5. Form a patty from mixture and coat in Panko or gluten free bread crumbs. Thick coating. Then drop the patty in the pan. Repeat until the pan is filled. Cook until browned on both sides. You could also bake. If baking, use less Panko. 6. Transfer cooked patties to paper towel. Cool for a few minutes. 7. Serve on toasted bun with lot of yummy toppings!

Editor’s Note:  This mix will make enough for about 4 burgers.

Nutrition Facts Serving Size  (392g)

Amount Per Serving Calories 590    Calories from Fat 220    % Daily Value Total Fat 25 g 38 %  Saturated Fat 3 g 15 %  Trans Fat 0 g    Cholesterol 0 mg 0 %  Sodium 770 mg 32 %  Total Carbohydrate 78 g 26 %  Dietary Fiber 16 g 64 %  Sugars 16 g    Protein 20 g

Vitamin A   390 %  Vitamin C   40 %  Calcium   20 %  Iron   30 %

originally posted on December 14, 2012

Pasta- keeping it simple

WP_000535Pasta.  For many of us athletes its become the common denominator for the fuel that keeps us going.  It comes in many shapes, sizes, flours and ethnic origins.  According to some research there might be over 600 types out there.  From spaghetti and penne to soba and udon to egg mein and silver needle, on and on it goes.  One of the wonders of noodles are that they begin with most often nothing more than dried flour ( wheat, rye, buckwheat, rice) with water added (sometimes egg or a vegetable puree), kneaded and worked to develop gluten ( the strands of stuff that give it and bread its shape) then sometimes dried (although often used fresh without drying).  Pasta has come to be a marvelous method to provide sustenance and energy for the world’s masses for hundreds of years.

Not surprising that along the way noodles have been co-opted and absorbed by dozens of cultures around the globe yielding innumerable variations as ingredients and sauces are added.  This my friends is one of the joys and wonders of cusine and culture.

One of the glories of pasta (and noodles) is that it is really a simple food.  Each type, style and manufacturer claim a special nuance of flavor and texture.  There is no arguing that egg noodles taste and feel differently in the mouth than a thin rice noodle or rustic spelt pasta.  Handled indifferently and it produces a sad and forelorn dish.  Too often the pasta bowl ends up a kitchen sink approach to cooking with “god knows” how many unrelated ingredients piled together and sauced heavily.  While it may give you the same approximate nutritional benefit I’ll say that its poor dining at best.  Just don’t do it.  Better to heed the mantra that less is more.  A few intelligently chosen ingredients, carefully prepared are all that is needed.  That hunk of broccoli, handful of tomatoes or bunch of spinach lying about might be better on the side, cooked seperately in its own right.   Paired with a crisp salad and pleasingly robust glass of wine is the way to go.

This recipe is for a simple pasta dish using fusilli shaped pasta that is readily available (but honeslty you can certainly substitute whatever you have at hand).  The key is to be flexible, look for and develop the flavors.  Let it have some character and integrity.

For 2 servings:

  • 6 oz dried pasta (fusili or other shapes are good)(remember it will more than double in weight after it is cooked)
  • 3 oz fresh sausage (a good Italian style fennel sausage is a super place to start. But don’t be shy here.  A little more or a different flavor will be just fine.  One word of caution is for this recipe is to stay away from the sausages that contain fruit)
  • 4 oz shredded cooked chicken ( optional but a great way to build flavor, texture and add a boost of lean protein)
  • 1 Tablespoon extra virgin olive oil
  • 3 Tablespoons grated parmesan

Bring a large pot of water to boil with a pinch of salt. When the water is really boiling vigorously add the pasta.  Set the timer for 10 minutes and go to work on the rest of the dish.

Heat a large shallow saue pan (if you have a non-stick version all the better).

WP_000531

Add the olive oil and swirl the pan.  Add the sausage and let it cook for 2 minutes moving it around a bit several times.  Its okay to let it brown a bit.

Add the chicken and stir it in.  Let this cook over a medium to low-ish heat while the pasta cooks.  When its hot remove from heat and keep warm.

For the Broccoli:

  • 1 head broccoli ( or cauliflower prepped same way) trimmed into 2-3 inch pieces.  Tip: keep any leaves and cook them with the tops.  Also I like to trim off the bottom 2 inches or so off the bottom of the stalk then thinly slice it and include in the dish.  Waste not/ want not!
  • 1/2 cup water (warm)
  • 1 teaspoon dried chile flakes
  • 1 clove garlic, peeled and minced (or grated or thinly sliced) (Note: don’t sweat over this. The idea is again to build flavor.
  • 1 Tablespoons extra virgin olive oil
  • 1/8 teaspoon kosher salt
  • Optional – 1-2 anchovy filets minced small  (if you choose this route and its one I highly recommend be sure to purchase a good quality anchovy like Recca or Scalia.)

In sturdy pot with a lid heat the oil over a low heat until just hot.  Add the garlic and chili flakes and cook SLOWLY for about a minute.  Stir often and don’t let them brown.  (If you use the optional anchovy add it here)

WP_000528Add the broccoli and water.  Cover the pot with the lid and raise the heat a little until the water begins to boil.  Keep the heat at a medium low level.  Stir a couple of times  and let cook for 8 minutes.

WP_000526Check to make sure the water does not boil dry.  Add the salt.  At the end of 8 minutes remove the lid.  The broccoli should be soft and just beginning to lose its bright green color.  Its okay.  If its not  cover and let cook for another 2 mintues.  Were not making crunchy steamed vegetables here.  If there is still a bit of water you can pour some off or just raise the heat and let it boil for a few minutes.

WP_000530The flavor of slow cooked broccoli is beautifully rich with a bit of umami showing thru.  Curioiusly the flavor works really well with other big flavored dishes and won’t kill the flavor of red wine.

Oh yeah, don’t foreget the salad.  Time of year keep an eye out at the markets for those super bittery salad greens like frisee, escarole and radicchio.WP_000536

Nutrition Facts Serving Size  (337g)

Amount Per Serving Calories 680    Calories from Fat 250

% Daily Value Total Fat 28 g 43 %  Saturated Fat 7 g 35 %  Trans Fat 0 g    Cholesterol 50 mg 17 %  Sodium 1340 mg 56 %  Total Carbohydrate 71 g 24 %  Dietary Fiber 5 g 20 %  Sugars 3 g    Protein 35 g

Vitamin A   80 %  Vitamin C   200 %  Calcium   25 %  Iron   15 %

An Apple a Day – blueberry/apple crisp

WP_000570On Sunday while pulling dinner together it was decided that we needed something sweet to complete the meal.  A quick inventory of the kitchen and fridge suggested a sure fire solution.  It turns out that my wife had spirited away several cups worth of fresh blueberries some time back in early October at the tail end of berry season.  Next to the bag of blueberries lay a stash of crisp topping.  Now it was beginning to take shape.  Though the berries weren’t quite enough to make a full on crisp dessert we did have a supply of super apples we had purchased the previous day at the farmers’ market.  The solution was complete.  Apple-Blueberry Crisp.

Now I have to say that all things considered the crisp is probably one of the quickest and easiest desserts out there.  Especially if you have some topping already prepped out.  Chopped up fruit, a squeeze of lemon juice, dash of vanilla or brandy, tablespoon of flour to help thicken the juices, then a generous addition of crisp topping.

The topping part is the highlight of dish most times.  The fruit, though appreciated and delicious in its way is an excuse to delight in the caramel flavored, crunchy, buttery sweet topping.  Here is a recipe for the one we had.   The instructions for the topping will yield a quantity sufficient for several recipes of fruit crisp in a 9 in x 9 in pan.  Stash the extra away in the freezer for future reference.

WP_000564

Crisp Topping (remember this makes more than you’ll need for one crisp so freeze the rest)

  • 16 Tablespoons unsalted butter, cut into small pieces
  • 1/2 cup flour ( can be All Purpose or even whole wheat, both work fine)
  • 1 1/2 cups rolled oats
  • 1 cup brown sugar, packed firmly as you measure
  • Optional -1/2 cup chopped nuts ( your call here.  Can be walnuts, pecans or even hazelnuts.  Its nice because the lend a complexity to the dish not too mention they’re hella nutritious.)
  • 1/2 teaspoon ground cinnamon
  • 1/4 teaspoon kosher salt

If you have a food processor fine.  If not that’s okay too.

In the food processor put the butter, flour, sugar, salt and cinnamon. Pulse the motor until the mixture looks like coarse cornmeal.  This should take 8-10 good pulses.  Add in the oats and give it a few more pulses.  Turn it all out into a bowl and add the nuts.  There, its ready.  Best thing to do is store it in a zip-lock bag in the freezer.  That way you can grab what you need when the inspiration strikes.

Alternatively if you do this by hand no worries, life and man existed on earth prior to the invention of the Cuisinart.  Simply put the butter, flour, brown sugar, salt and sugar in a large bowl and with your finger tips mash it all together.  Its kinda fun cause you get down and dirty with your food. Gives you a better connection to the texture of things.  You soon see the mix start to resemble that rough large graininess.  This should take 5 minutes max.  Its okay if there are some smallish lumps of butter in there, not to fret.  They’ll be okay in the end.  Add in the oats (and nuts if you choose) and mix together well, again by hand.  Voila!  Good to go!

Now the fruit.  (in a seperate bowl)

  • 6 Apples medium size quartered, core taken out and chopped into 1 inch pieces
  • 1-2 cups blueberries (fresh or frozen, not thawed)
  • 2 Tablespoons Lemon Juice + the zest of one
  • 2 Tablespoons brandy (optional)
  • 1-2 Tablespoons flour

Mix all together in bowl. Turn this fruit mix into a 9 in X 9 in baking dish of some sort.  No need to be picky but if its any larger just add a cup of fruit to compensate. Bake this in a pre-heated 375F oven for about 45- 50 minutes.  It’ll get bubbly around the edges and the top should be nicely browned.  When done remove from oven and let cool for 20 minutes.  I know this is gonna be hard but if you taste it now you’ll burn the bejeezes out of you taste buds, and that sucks.

I recommend eating this as is, or with you favorite vanilla ice cream or with yogurt in the AM.  It warms nicely in the oven or microwave too.

WP_000562WP_000565WP_000566

Nutrition Facts Serving Size  (139g) (this includes the use of almonds)

Amount Per Serving Calories 220    Calories from Fat 80    % Daily Value Total Fat 9 g 14 %  Saturated Fat 5 g 25 %  Trans Fat 0 g    Cholesterol 20 mg 7 %  Sodium 45 mg 2 %  Total Carbohydrate 34 g 11 %  Dietary Fiber 5 g 20 %  Sugars 20 g    Protein 2 g

Vitamin A   6 %  Vitamin C   10 %  Calcium   2 %  Iron   4 %