Reading Roasted Gallus gallus domesticus on the menu probably won’t cause a positive gustatory response. Chicken(s) as we know them today are distant relatives of a wild species, Red Junglefowl, that was domesticated several thousand years BC for cockfighting in the Indian/ southeast Asian subcontinent. From there their cultivation migrated across Asia and into the Middle East and the rest is history.
A chicken in every pot. Upwards of 50 billion are farmed annually across the world. Modern husbandry methods combined with careful breeding has produced strains that reach market in as little as 6 -12 weeks. Cornish game hen? Probably a young chicken of 25 or so days old. Poussin? maybe 60 days of age. Fryers are next then broilers or roasters. Each week produces a larger bird and different use. Most of what we see in our markets are fryers of about 2 1/4 to 2/1/2 lbs each. Roasters might be slightly larger at 3lbs. Stew hens are harder to come by in most markets and may be as hefty as 6lbs. The flavor of those birds can be bit of surprise for most palates. Thinking back over the years I, as have many chefs and cooks, have ordered, marveled and agonized that the cases (24 to a case for fryers) of chickens oft times varied no more than a few ounces from each other while others 6-8 ounces. When you portion it out and plate it the size difference can look silly one next to the other. Remember, they aren’t widgets.
Here is a quick how-to on a roast chicken dish for dinner this week. Personally there are few meals as satisfying as a simple roasted whole chicken, liberally seasoned with salt and pepper, served with an equally straight forward vegetable accompaniment and crisp salad. Don’t stop here because the best and tastiest part is at the end below.
First and perhaps foremost is the chicken. Do not, and I repeat, do not default to the sad, shrink wrapped bird thingy you find in most supermarkets. Do yourself a big favor and get out there and find a locally raised bird. Most supermarket chains will buy cases upon cases of birds that are factory farmed in Arkansas, Mississippi or similar points, harvested, iced, packed into plastic lined cardboard boxes and driven to wholesalers across the country. Side by side the contrast is stark. Factory farmed bird- flaccid and pale, no life to it at all. Get one from the area in which you live and it will have a firmness to the flesh (check the wings), Better and best is it will be labeled from whence it came. Take the time to start the discussion. Its well worth it. Ask the kind and respectable people who are behind the counter to tell you about that bird. Queue the Portlandia chicken scene – Is this chicken local?
The freshness of the bird will make all the difference in the world come eating time. I’ve visited smallish neighborhood markets, farmers’ markets, co-ops, fancy smanshy uppity markets from coast to coast and I know you can do it.
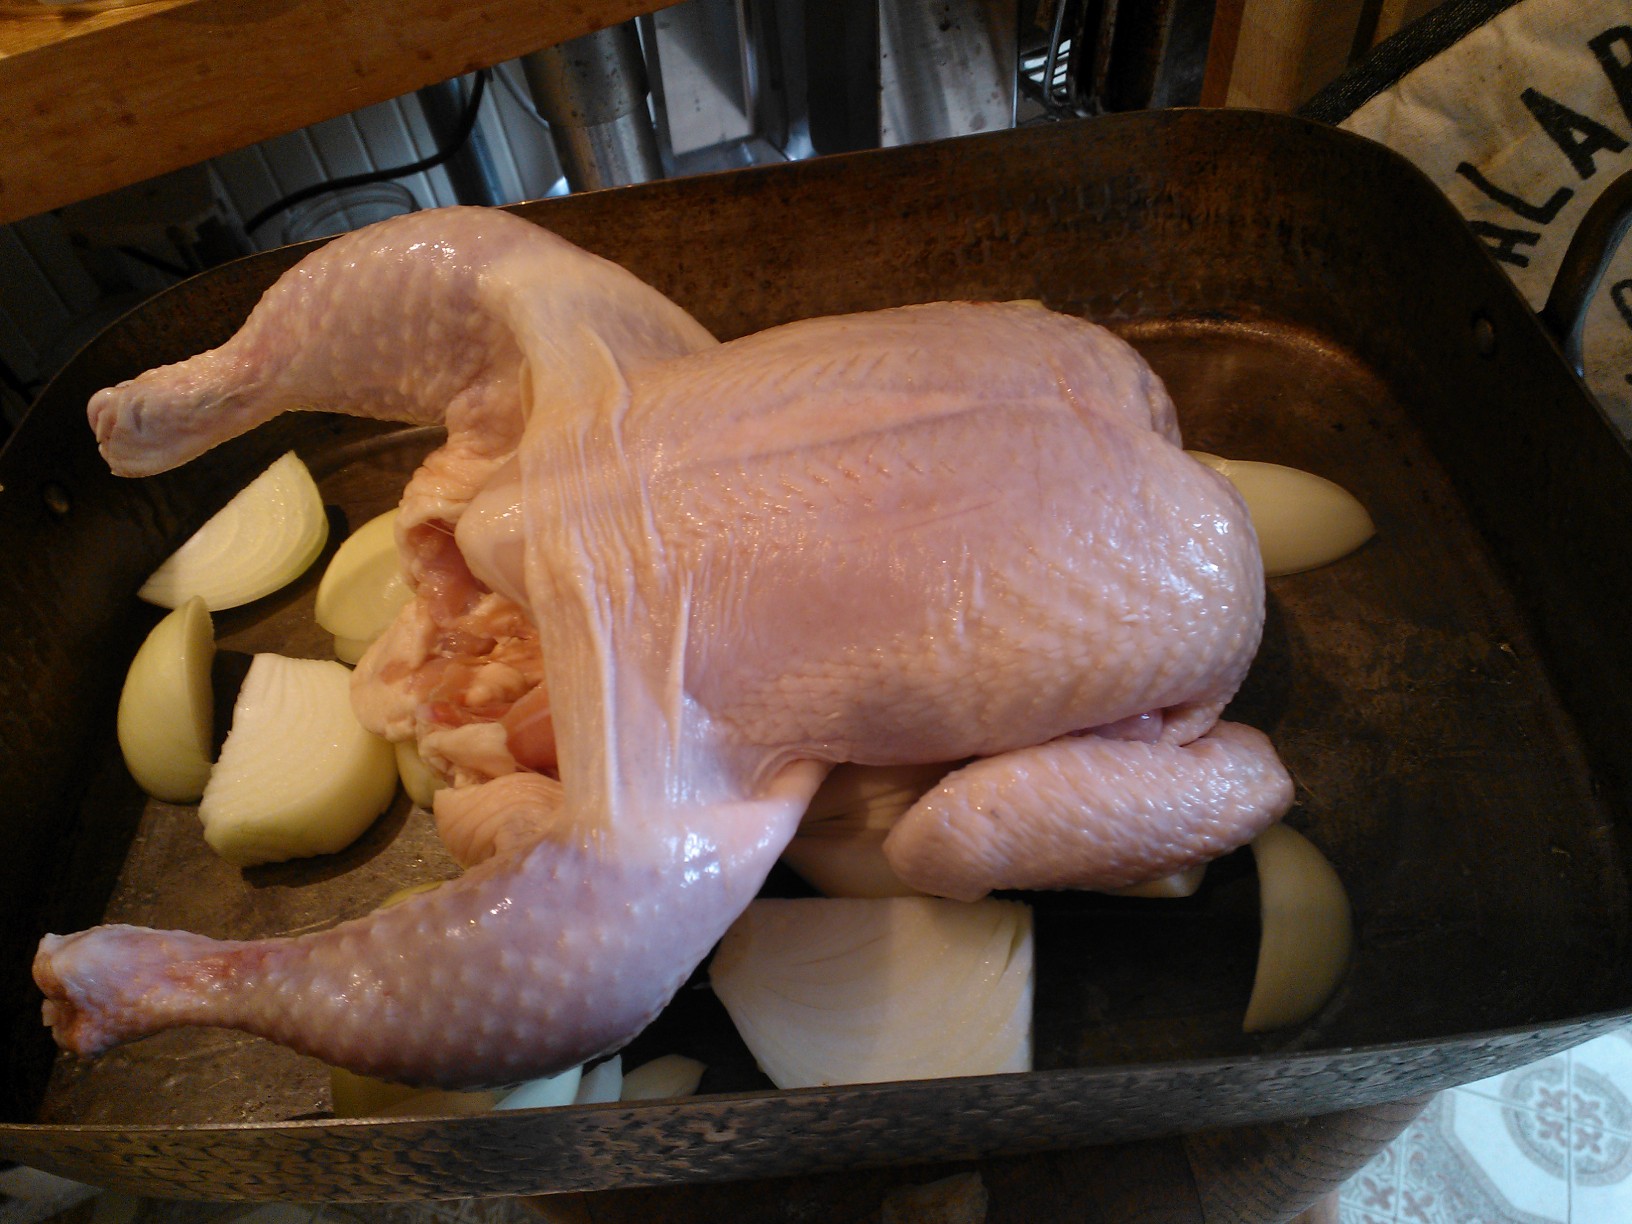
Farm to Field Chicken seasoned and ready to rock!
Now that we have that settled lets get on to the bird. Let it sit at room temp for 30-45 min while the oven heats up (450F), the vegetables and potatoes get prepped, salad greens washed and table set. Rather than make this an overwrought version of something out of a Top Chef outtake I suggest doing it up with kosher (or sea) salt. Don’t be shy here. Fresh ground pepper should go on too. The wife and I like to add a few wedges of lemon, a scrunched up bouquet garni of thyme, parsley and fresh bay leaves. Hey if you don’t have these its not the end of world. Improvise. My only advice is to keep it simple. 
Use a roasting pan (or any low sided pan) that leaves 3 inches or so around the chicken. Key info here. High sided pan, crammed in chicken equals a steamed bird. Not the worst thing but not what we’re looking for here. Good but for another type of dish. After you season the bird give it a light treatment with a good olive oil. Place it in the pan and into the oven it goes.
After 18 minutes pull the pan out and tip the chicken up from the front and let the juices run out of the cavity. Things will sizzle and pop when you do this and this will help with the resulting jus that collects in the pan. At the same time grab a small ladle or spoon and scoop up juices and melted chicken fat and pour it over the top of the bird. Do this two or three times then return the chicken to the oven. Repeat this several times over the next 15 minutes.
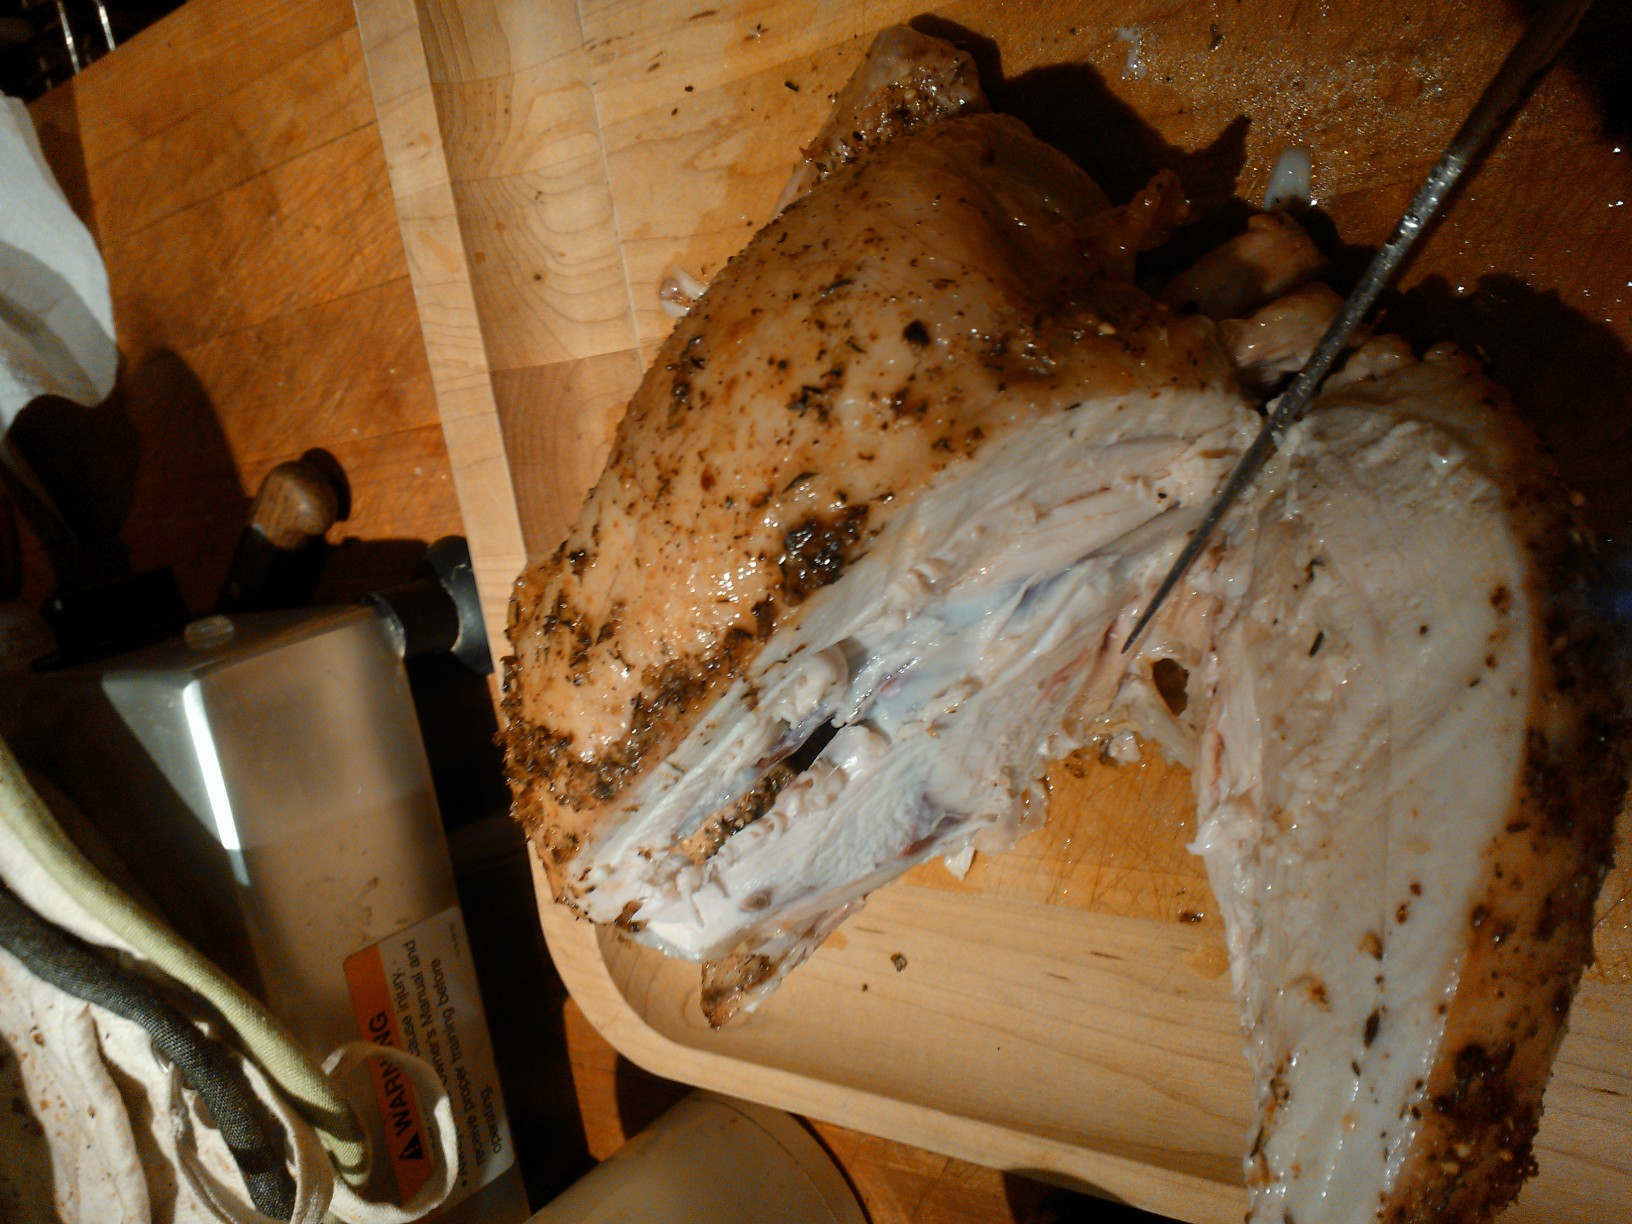
35-40 minutes from the time it goes in the oven check for doneness. Several routes to go here. You can pull one of the legs away from the body and snip in the crease there with a sharp knife to see if the juices run clear, if so you’re good to go. Another is to employ one of those meat thermometers. I like the fancier ones that are digital and have a probe with a long wire attached. There great for all kinds of uses this being one. Look for a temp of 145F. Pull the pan out of the oven. Give the bird a bathing again with its juices and let it rest for 15minutes before you cut it. Same routine as with any roast or steak. This will let the juices settle in the flesh and make for better eating piece of chicken.

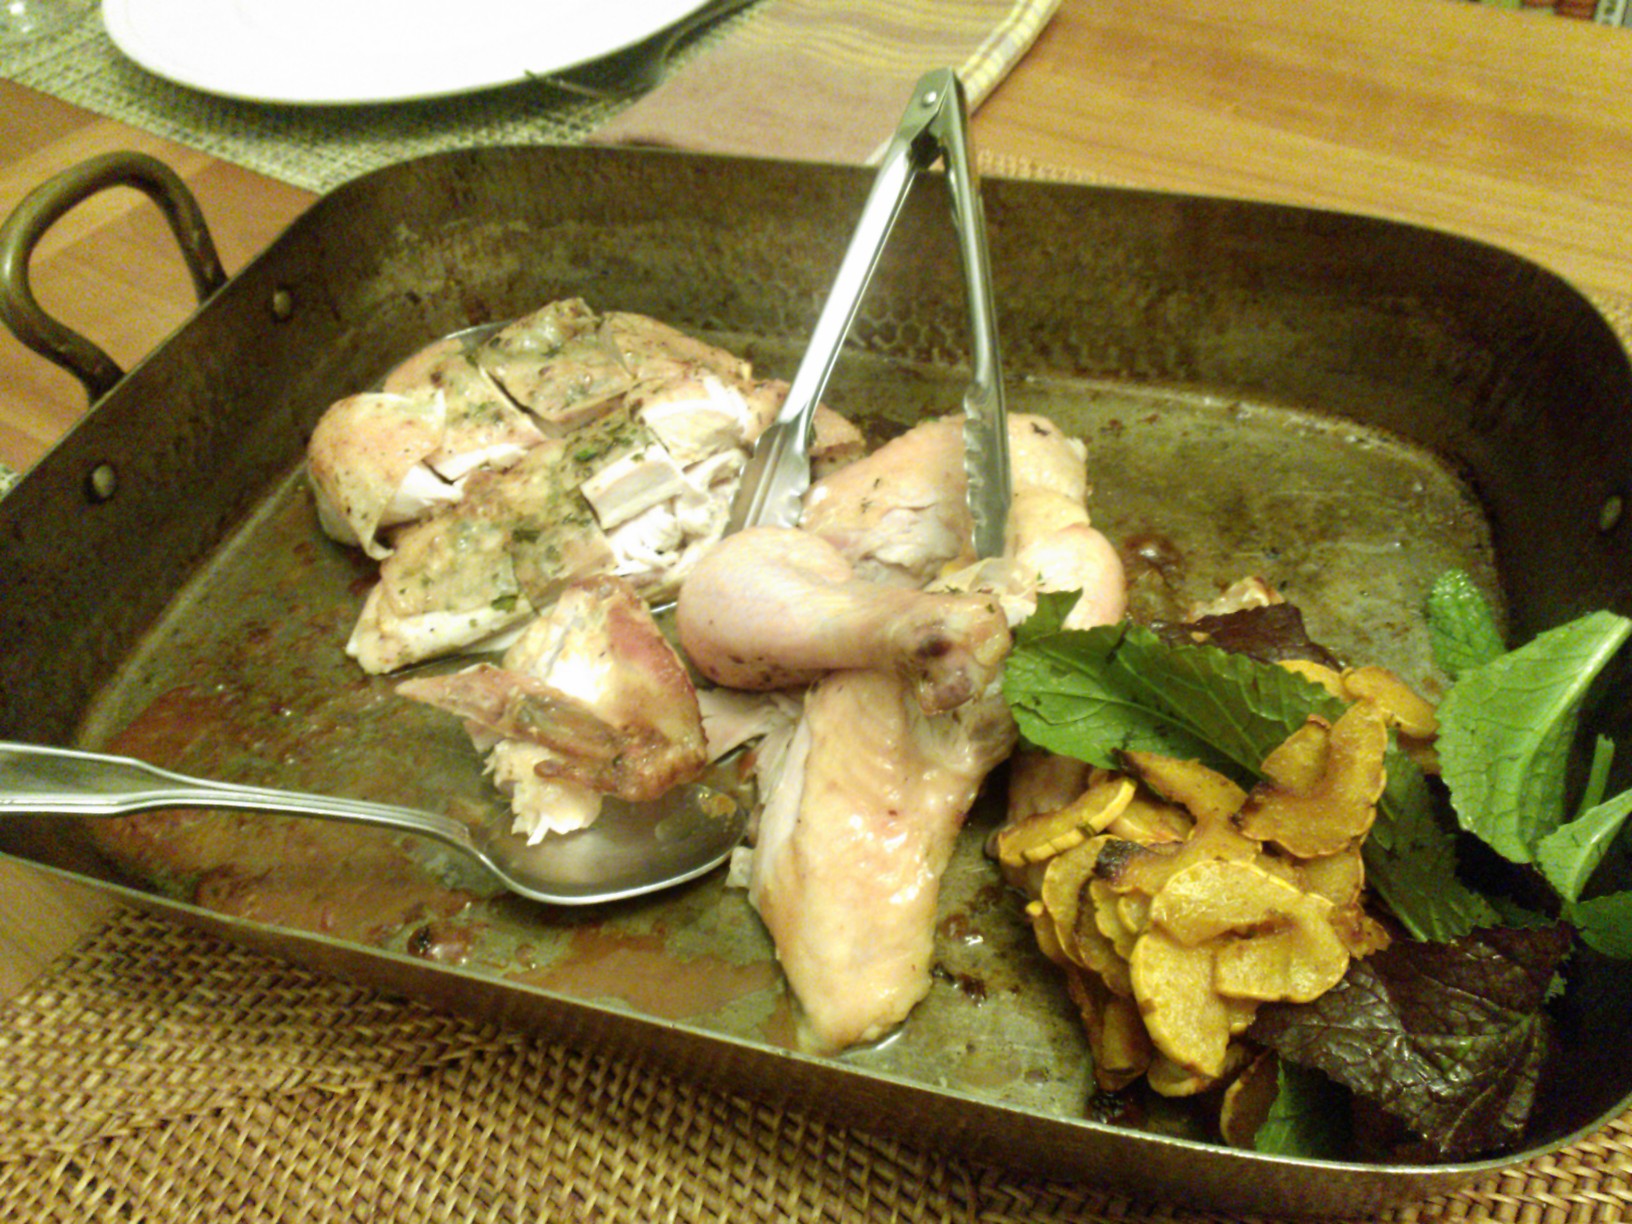
Out of the oven and resting. Almost ready to cut up.
(Okay, I know pretty much all sources are gonna tell you to cook chicken to 165F. As the bird sits there resting prior to cutting up for service the internal temperature will continue to climb probably nearly reaching the hallowed 165 barrier. I’m not going to argue with health and safety sources on whether its safe or not to eat chicken cooked this way. Suffice to say this is how I cook mine. I’ve enjoyed birds cooked in a similar fashion by any number of talented chefs and cooks with great results. Use your own discretion but I guarantee that erring on the lower side will give you a way juicer chicken experience.)
- Carving a chicken can be easy enough. The great thing is that this can be the weekly training camp for that OMG moment in late November when you standing there faced with a much, much larger bird. Ain’t no difference. One’s a miniature of the other.

- Separate the legs from the body by bringing the knife between the two. Find the joint and with the tip of the knife locate the joint. Pull down on the leg if its eluding you. Push the knife thru and there you go. Repeat with the other leg.
- Next, separate the breasts from the bone. Simply bring the knife (its sharp right?) along the breast bone then gently push and pull the breast meat away from the bone. Take care to keep the skin intact. Once its off you can slice it beautifully for serving.


- Wings are a snap at this point. Just find the joint and push the knife thru. Bingo!


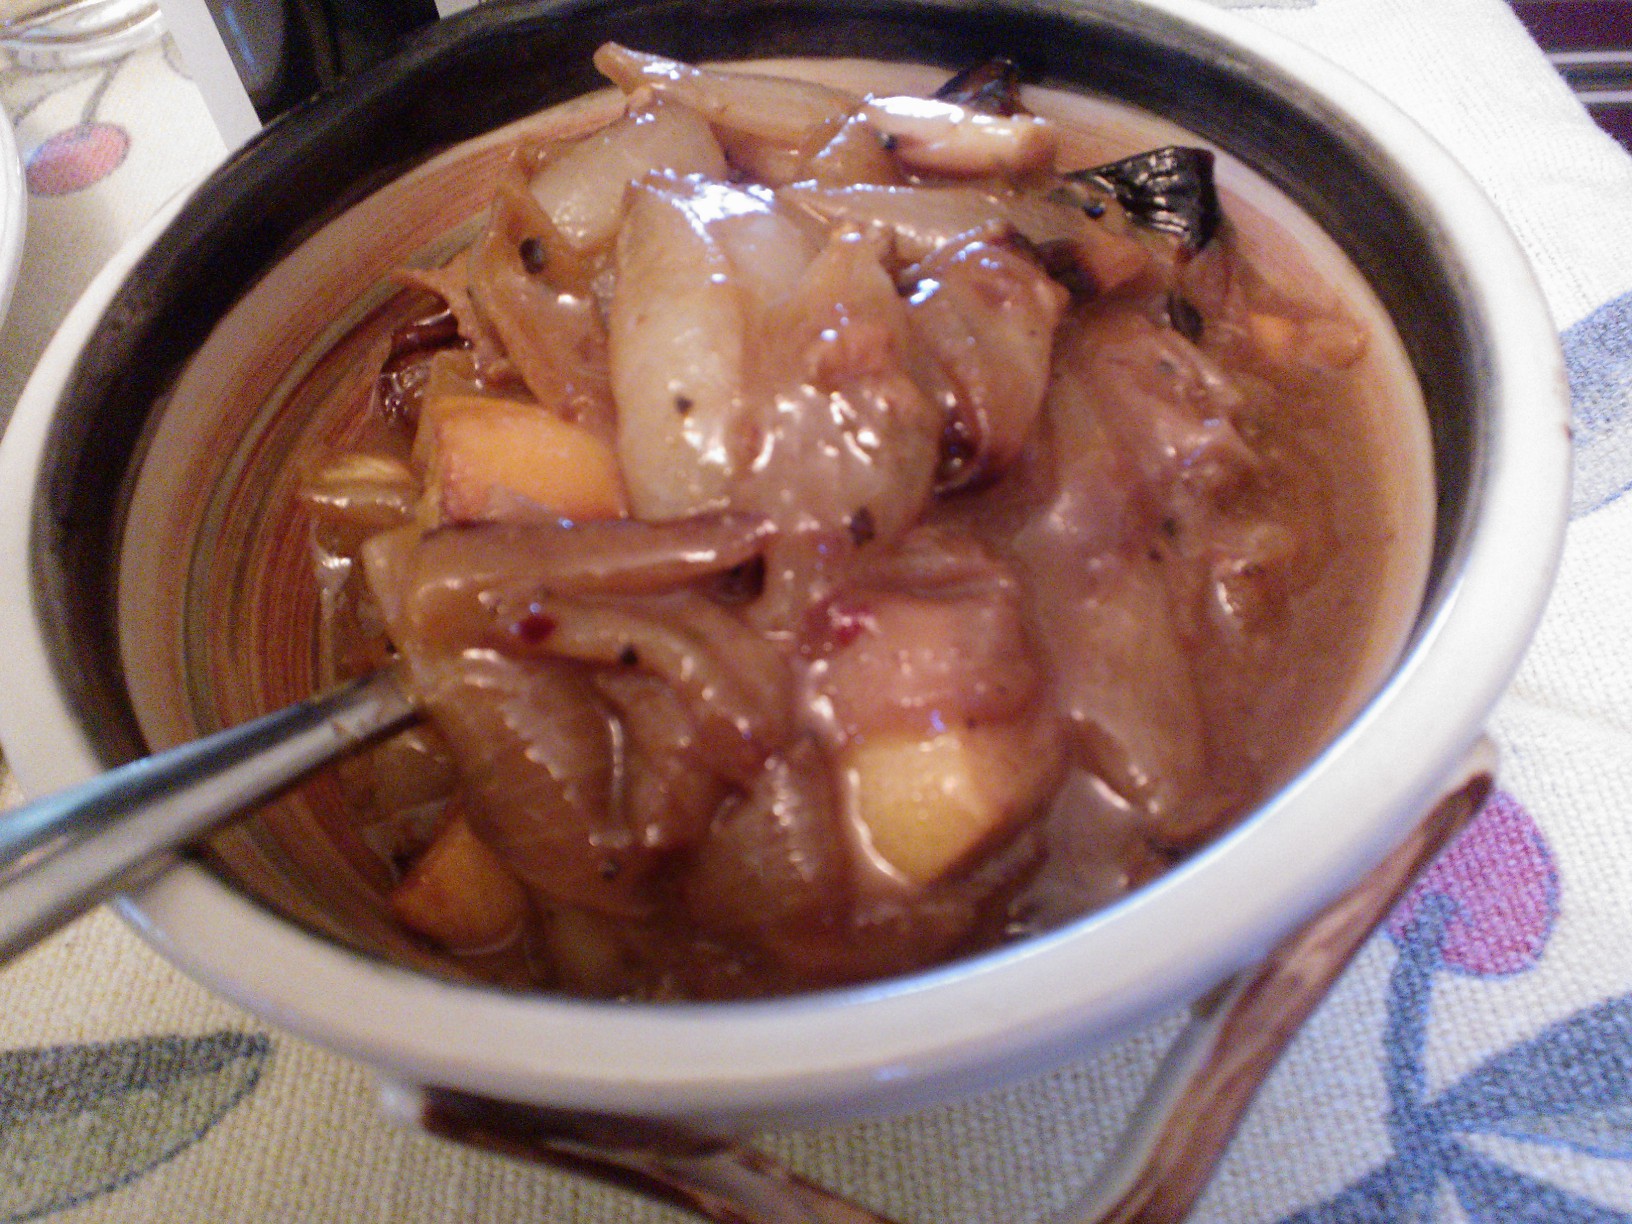
 Now for the fun part. You had to read to here to find it. Under the chicken we had an onion chopped big in the pan along with several whole cloves of garlic and a few left over pieces of the meyer lemon that wouldn’t fit inside mr chicken. No probs. Toss em in along with. While mr chcken is resting (ssshhhh!) set the pan on the stove top and let-er-rip. Bring to boil, add 1+ Tablespoons Dijon mustard and 1 cup white wine. Boil the heck outa this and let it reduce until it gets saucy and thick. Don’t fret, just give a stir to keep any edges from getting crispy. After 3 minutes you’ll see this begin to thicken up. Keep heart and don’t turn you’re back. If for some god awful chance it goes a tad too far turn off the heat and add a tablespoon or two of water (stock if you have but I was hope’n to avoid digging into the fridge for that). You can strain it if you have OCD tendencies and need things neat or you can serve it up as is, all rustic like.

See as the spatula is drawn across the bottom of the pan how it leaves a bare streak. That’s what we’re looking for.
And now the numbers.
Nutrition Facts Serving Size (195g)
Amount Per Serving Calories 470 Calories from Fat 320 % Daily Value Total Fat 35 g 54 % Saturated Fat 9 g 45 % Trans Fat 0 g Cholesterol 140 mg 47 % Sodium 610 mg 25 % Total Carbohydrate 0 g 0 % Dietary Fiber 0 g 0 % Sugars 0 g Protein 35 g
Vitamin A 6 % Vitamin C 4 % Calcium 2 % Iron 10 %